
In Microsoft 365, you can record a greeting, edit call answering rules, set up Outlook Voice Access, edit text message and email notification settings, and turn on voice mail preview using Outlook on the web.
-
To access voice mail settings in the new Outlook on the web, select Settings

-
To access voice mail settings in classic Outlook on the web, select Settings
-
To access voice mail settings in Outlook for PC, select File > Manage Voice Mail.
Notes:
-
Voice mail in Microsoft 365 will no longer be supported beginning in January 2020.
-
If voice mail options are grayed out, you're using the Skype for Business voice mail service with cloud PSTN. Voice mail options aren't available in Outlook.
-
Under Voice mail, select Greetings.
-
Select the type of greeting you want to record.

-
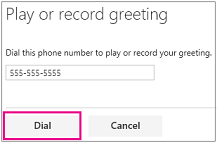
Select Call me to play or record the selected greeting.
-
Enter your phone number and select Dial.
-
Follow the instructions in the recorded message to record your greeting.
-
When finished recording, click Save.

Note: If Greeting that lets callers know you'll be away for an extended period of time is selected, the call answering rules previously recorded are ignored and only the greeting recorded for this option is played.
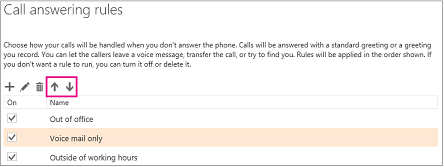
Use call answering rules to determine what happens when a caller reaches your voice mail. For example, if you have automatic replies turned on, then you could set up your rule to transfer the caller to a different number. If you have multiple rules, you can specify the order in which they are applied.
If you don't create call answering rules, incoming callers will be sent directly to your voice mail when you’re not available.
If you create a call answering rule but don't specify an action, your caller will hear the following prompt: "You have reached the mailbox of <name>. Please call back later. Goodbye." and the call will end.
To create a rule
-
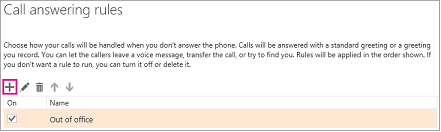
Under Voice mail, select Call answering rules.
-
Click the new button.
-
Type a name for your rule.
-
In If the caller reaches my voice mail and, select an option.
-
If you want to add another condition to your rule, select Add condition. You can add multiple conditions to a rule but do this judiciously so your rules don't become overly complex.
-
In Provide the caller with these options, select an option. Some options will prompt you for additional information, such as an alternate phone number or text to be read to the caller.
-
If you want to add another option to your rule, select Add option.
-
Select OK.
-
Use the checkbox on the Call answering rules page to turn the rule on or off.
To edit a rule
-
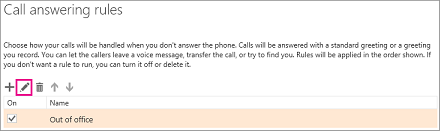
Under Voice mail, select Call answering rules.
-
Select the rule you want to edit and click the edit button.
To delete a rule
-
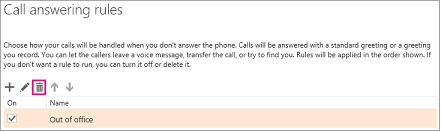
Under Voice mail, select Call answering rules.
-
Select the rule you want to delete and click the delete button.
To change the order that rules are applied
-
Under Voice mail, select Call answering rules.
-
Rules are listed in the order applied, so select the rule you want to move up or down in the order and click the arrows.
With notifications, you're alerted when you miss a call or receive a voice mail message. You can decide how and when you want to be alerted. For example, you can receive an email when you miss a call or get a text message when someone leaves a voice mail. By default, you'll receive an email anytime you miss a call, but text messaging notifications are turned off.
Set up text messaging notifications
-
Under Voice mail, select Notifications.
-
Click Set up text messaging.
-
Choose the country where your phone is registered.
Note: The text messaging notifications feature is only supported in specific regions and for specific mobile service providers. If you don't see your mobile service provider listed, you won't be able to set up text messaging notifications.
-
Choose your mobile service provider and click Next.
-
Enter your phone number and click Next.
-
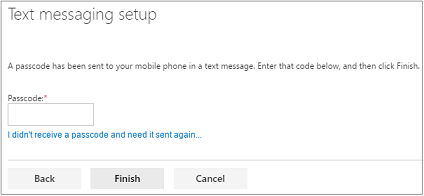
You'll receive a text message with passcode attached. Enter that passcode on the Text messaging setup screen and click Finish.
-
Choose when to receive text message notifications and click Save.
Edit text messaging notification settings
-
Under Voice mail, select Notifications.
-
Click Edit text messaging settings.
-
Select a text messaging option and click Save.
Outlook Voice Access enables you to use your phone to access voice mail, email, calendar, and contacts. The options you set for Outlook Voice Access include the order in which you access new messages and the folder that you dial in to, e.g., Inbox.
What's the phone number for Outlook Voice Access? The phone number and PIN are provided to you by your admin when he or she sets you up for voice mail. Contact your admin for assistance.
Play on phone enables you to play your voice mail messages over a telephone using the phone number you specify.
By default, the telephone number is the one assigned to you by your organization, but it could also be a cell phone number or email address. In that case, voice mail would be played back through your email Inbox.
To set the number for voice messages
-
Under Voice mail, select Play on phone.
-
Type the phone number or email address you want to use for voice messages.
-
Click Save.
Your PIN enables you to access your mailbox and calendar information through Outlook Voice Access . When you reset your PIN, a temporary PIN will be delivered to your email Inbox. Use the temporary PIN the next time you call Outlook Voice Access. You'll be prompted to create a permanent PIN at that time.
To reset your voice access PIN
-
Under Voice mail, select Reset PIN.
-
Click Reset my voice mail PIN.
-
Click Yes to confirm the reset.
Voice mail preview enables you to preview the text of voice messages you receive. You can also have text previews included with voice messages you send.
To turn on Voice mail preview
-
Under Voice mail, select Voice mail preview.
-
Select or deselect the options you want. Both are selected by default.
-
Click Save.


