Upgrading to AD FS in Windows Server 2016 with SQL Server
Important
Instead of upgrading to the latest version of AD FS, Microsoft highly recommends migrating to Microsoft Entra ID. For more information, see Resources for decommissioning AD FS
Note
Only begin an upgrade with a definitive time frame planned for completion. It isn't recommended to keep AD FS in a mixed mode state for an extended period of time, as leaving AD FS in a mixed mode state may cause issues with the farm.
Moving from a Windows Server 2012 R2 AD FS farm to a Windows Server 2016 AD FS farm
The following document will describe how to upgrade your AD FS Windows Server 2012 R2 farm to AD FS in Windows Server 2016 when you're using a SQL Server for the AD FS database.
Upgrading AD FS to Windows Server 2016 FBL
New in AD FS for Windows Server 2016 is the farm behavior level feature (FBL). This feature is farm wide and determines the features that the AD FS farm can use. By default, the FBL in a Windows Server 2012 R2 AD FS farm is at the Windows Server 2012 R2 FBL.
A Windows Server 2016 AD FS server can be added to a Windows Server 2012 R2 farm and it will operate at the same FBL as a Windows Server 2012 R2. When you've a Windows Server 2016 AD FS server operating in this fashion, your farm is said to be "mixed". However, you won't be able to take advantage of the new Windows Server 2016 features until the FBL is raised to Windows Server 2016. With a mixed farm:
Administrators can add new, Windows Server 2016 federation servers to an existing Windows Server 2012 R2 farm. As a result, the farm is in "mixed mode" and operates the Windows Server 2012 R2 farm behavior level. To ensure consistent behavior across the farm, new Windows Server 2016 features can't be configured or used in this mode.
Once all Windows Server 2012 R2 federation servers have been removed from the mixed mode farm, one of the new Windows Serve 2016 federation servers has been promoted to the role of primary node, the administrator can then raise the FBL from Windows Server 2012 R2 to Windows Server 2016. As a result, any new AD FS Windows Server 2016 features can then be configured and used.
As a result of the mixed farm feature, AD FS Windows Server 2012 R2 organizations looking to upgrade to Windows Server 2016 won't have to deploy an entirely new farm, export and import configuration data. Instead, they can add Windows Server 2016 nodes to an existing farm while it's online and only incur the relatively brief downtime involved in the FBL raise.
In mixed farm mode, the AD FS farm isn't capable of any new features or functionality introduced in AD FS in Windows Server 2016. Organizations that want to try out new features can't do this until the FBL is raised. So if your organization is looking to test the new features prior to raising the FBL, you will need to deploy a separate farm.
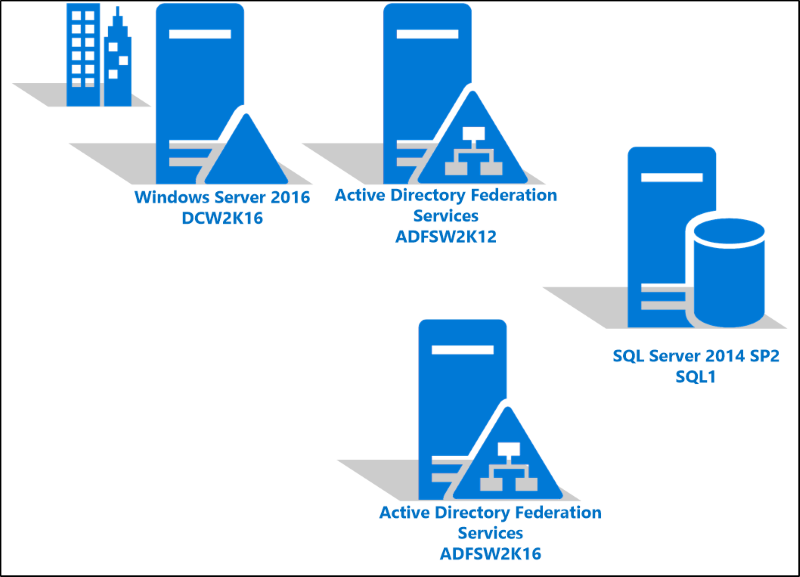
The remainder of the is document provides the steps for adding a Windows Server 2016 federation server to a Windows Server 2012 R2 environment. These steps were performed in a test environment outlined by the architectural diagram below.
Note
Before you can move to AD FS in Windows Server 2016 FBL, you must remove all of the Windows 2012 R2 nodes. You can't just upgrade a Windows Server 2012 R2 OS to Windows Server 2016 and have it become a 2016 node. You will need to remove it and replace it with a new 2016 node.
Note
If AlwaysOnAvailability groups or merge replication are configured in AD FS, remove all replication of any AD FS databases prior to upgrade and point all nodes to the Primary SQL database. After performing this, perform the farm upgrade as documented. After upgrade, add AlwaysOnAvailability groups or merge replication to the new databases.
The following architectural diagram shows the setup that was used to validate and record the steps below.
Join the Windows 2016 AD FS Server to the AD FS farm
Using Server Manager install the Active Directory Federation Services Role on the Windows Server 2016
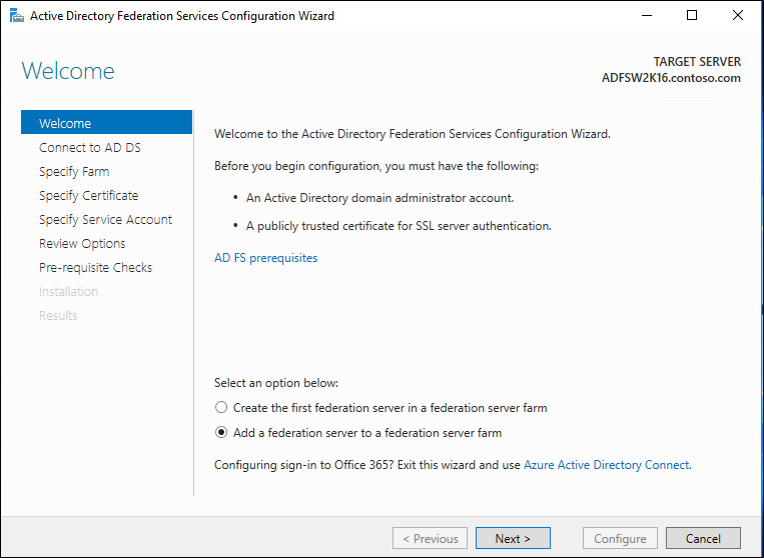
Using the AD FS Configuration wizard, join the new Windows Server 2016 server to the existing AD FS farm. On the Welcome screen, click Next.
On the Connect to Active Directory Domain Services screen, specify an administrator account with permissions to perform the federation services configuration and click Next.
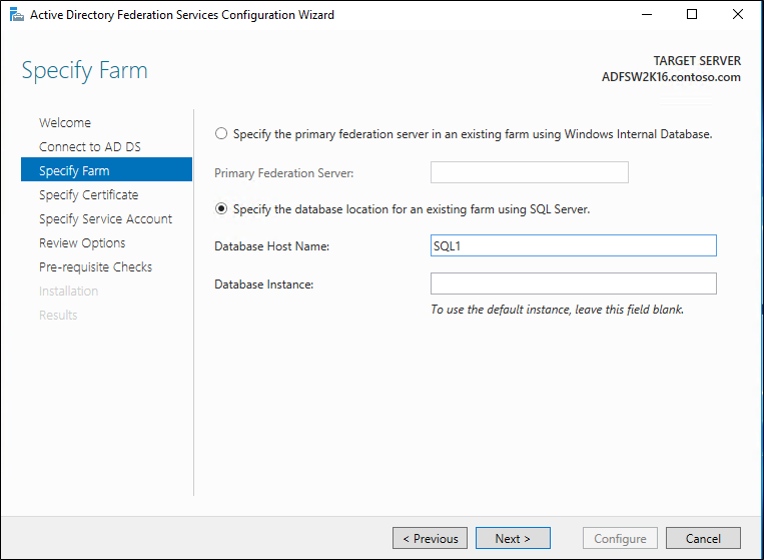
On the Specify Farm screen, enter the name of the SQL server and instance and then click Next.
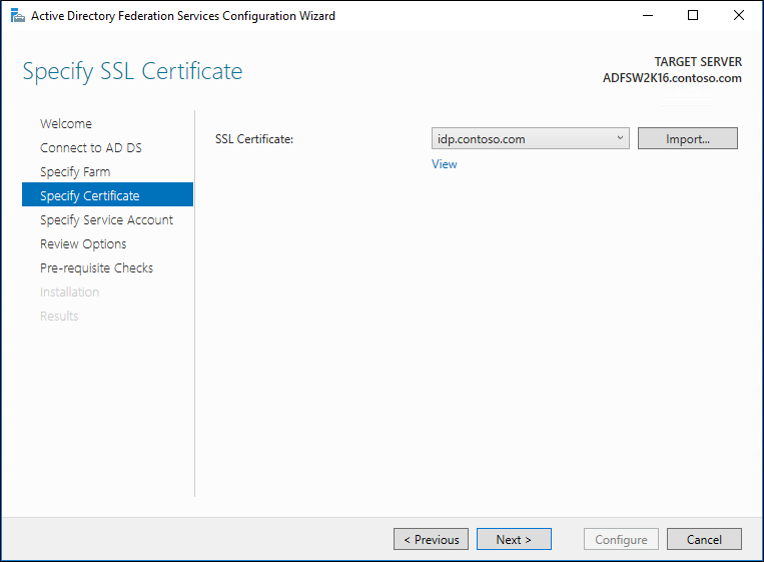
On the Specify SSL Certificate screen, specify the certificate and click Next.
On the Specify Service Account screen, specify the service account and click Next.
On the Review Options screen, review the options and click Next.
On the Pre-requisites Checks screen, ensure that all of the pre-requisite checks have passed and click Configure.
On the Results screen, ensure that server was successfully configured and click Close.
Remove the Windows Server 2012 R2 AD FS server
Note
You do not need to set the primary AD FS server using Set-AdfsSyncProperties -Role when using SQL as the database. This is because all of the nodes are considered primary in this configuration.
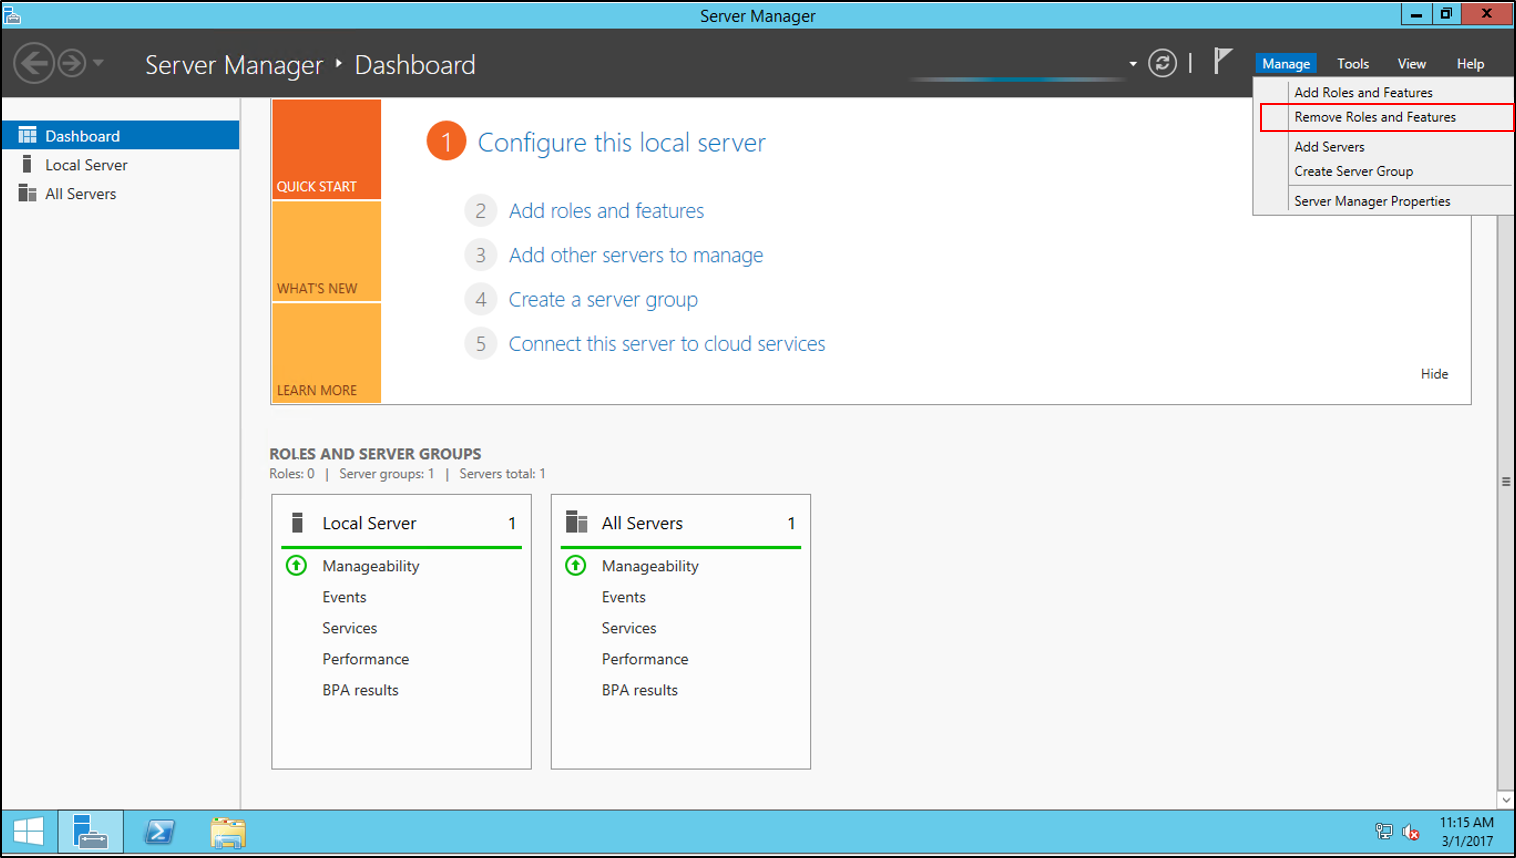
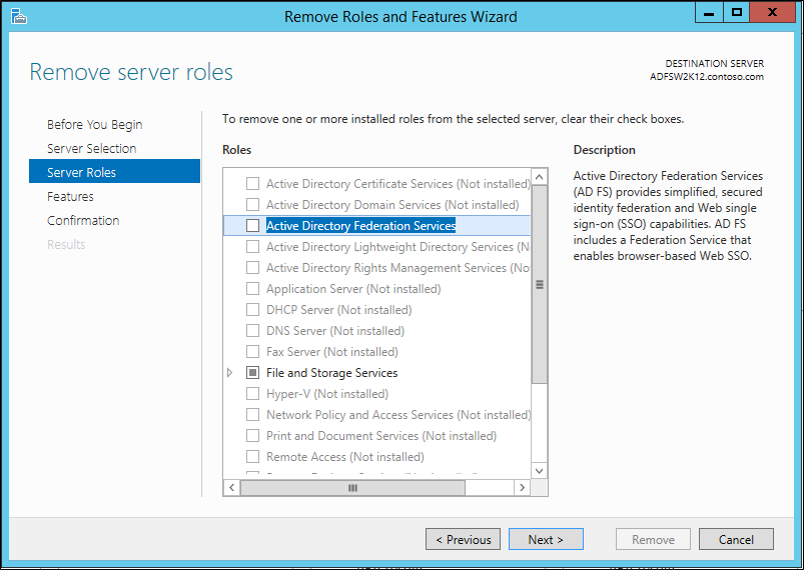
- On the Windows Server 2012 R2 AD FS server in Server Manager use Remove Roles and Features under Manage.
- On the Before you Begin screen, click Next.
- On the Server Selection Screen, click Next.
- On the Server Roles screen, remove the check next to Active Directory Federation Services and click Next.
- On the Features Screen, click Next.
- On the Confirmation Screen, click Remove.
- Once feature removal completes, restart the server.
Raise the Farm Behavior Level (FBL)
Prior to this step you need to ensure that forest prep and domain prep have been run on your Active Directory environment and that Active Directory has the Windows Server 2016 schema. This document started with a Windows 2016 domain controller and didn't require running these because they were run when AD was installed.
Note
Before starting the process below, ensure Windows Server 2016 is current by running Windows Update from Settings. Continue this process until no further updates are needed. Additionally, ensure AD FS service account account has the administrative permissions on the SQL server and each server in the ADFS farm.
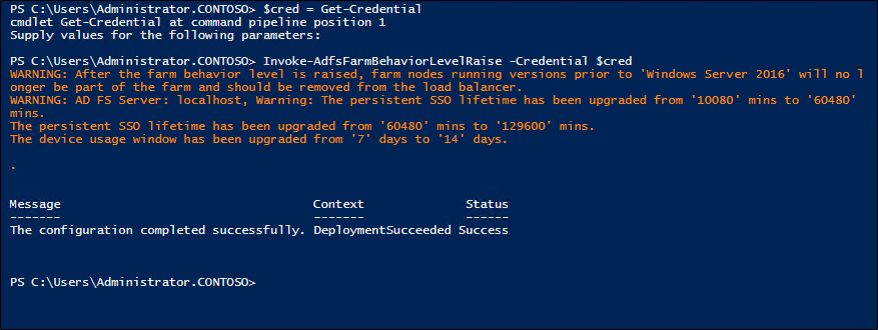
- Now on the Windows Server 2016 Server open PowerShell and run the following: $cred = Get-Credential and hit enter.
- Enter credentials with admin privileges on the SQL Server.
- Now in PowerShell, enter the following: Invoke-AdfsFarmBehaviorLevelRaise -Credential $cred
- When prompted, type Y. This will begin raising the level. Once this completes, you've successfully raised the FBL.
- Now, if you go to AD FS Management, you will see the new nodes.
- Likewise, you can use the PowerShell cmdlet: Get-AdfsFarmInformation to show you the current FBL.

Upgrade the Configuration Version of existing WAP servers
- On each Web Application Proxy, re-configure the WAP by executing the following PowerShell command in an elevated window:
$trustcred = Get-Credential -Message "Enter Domain Administrator credentials" Install-WebApplicationProxy -CertificateThumbprint {SSLCert} -fsname fsname -FederationServiceTrustCredential $trustcred - Remove old servers from the cluster and keep only the WAP servers running the latest server version, which were reconfigured above, by running the following PowerShell command.
Set-WebApplicationProxyConfiguration -ConnectedServersName WAPServerName1, WAPServerName2 - Check the WAP configuration by running the Get-WebApplicationProxyConfiguration command. The ConnectedServersName will reflect the server run from the prior command.
Get-WebApplicationProxyConfiguration - To upgrade the ConfigurationVersion of the WAP servers, run the following PowerShell command.
Set-WebApplicationProxyConfiguration -UpgradeConfigurationVersion - Verify the ConfigurationVersion has been upgraded with the Get-WebApplicationProxyConfiguration PowerShell command.
Feedback
Coming soon: Throughout 2024 we will be phasing out GitHub Issues as the feedback mechanism for content and replacing it with a new feedback system. For more information see: https://aka.ms/ContentUserFeedback.
Submit and view feedback for