Create a User Role for Access Control
Applies to: Windows Server 2022, Windows Server 2019, Windows Server 2016
You can use this topic to create a new Access Control user role in the IPAM client console.
Membership in Administrators, or equivalent, is the minimum required to perform this procedure.
Note
After you create a role, you can create an access policy to assign the role to a specific user or Active Directory group. For more information, see Create an Access Policy.
To create a role
In Server Manager, click IPAM. The IPAM client console appears.
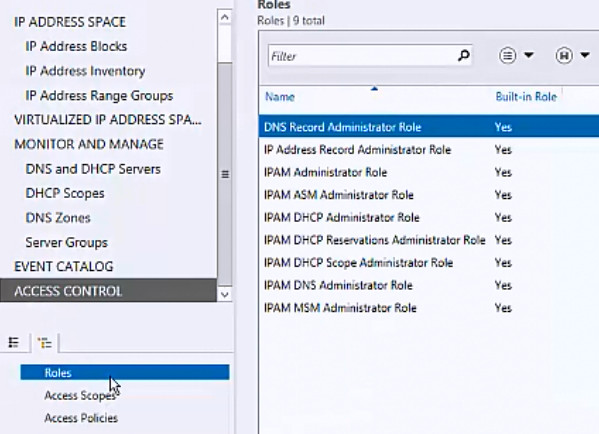
In the navigation pane, click ACCESS CONTROL, and in the lower navigation pane, click Roles.
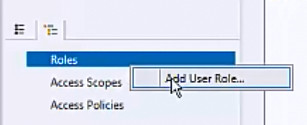
Right-click Roles, and then click Add User Role.
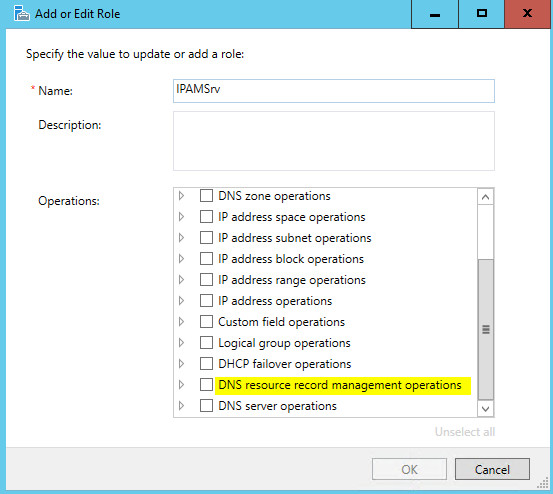
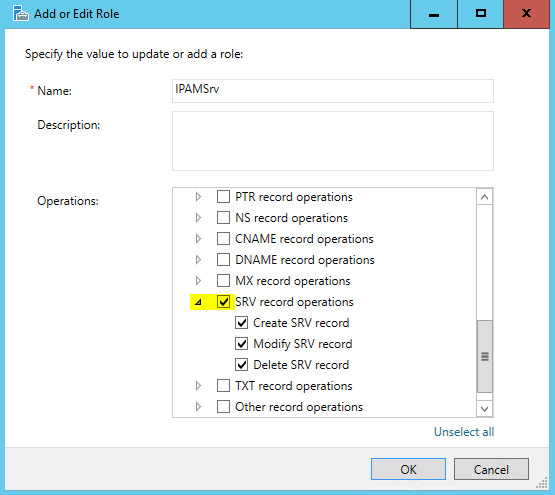
The Add or Edit Role dialog box opens. In Name, type a name for the role that makes the role function clear. For example, if you want to create a role that allows Administrators to manage DNS SRV resource records, you might name the role IPAMSrv. If needed, scroll down in Operations to locate the type of operations you want to define for the role. For this example, scroll down to DNS resource record management operations.
Expand DNS resource record management operations, and then locate SRV record operations.
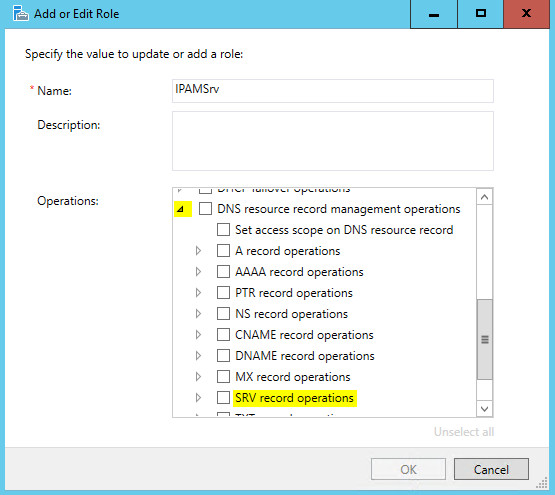
Expand and select SRV record operations, and then click OK.
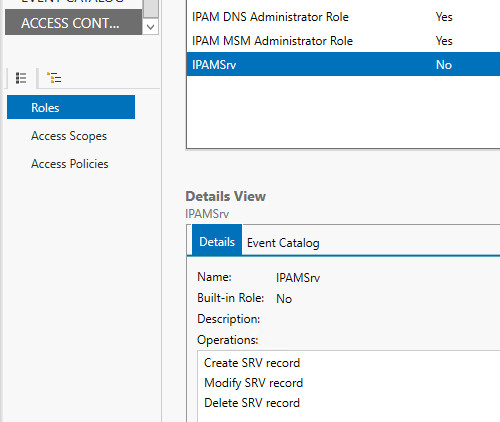
In the IPAM client console, click the role that you just created. In Details View, the permitted operations for the role are displayed.
See Also
Feedback
Coming soon: Throughout 2024 we will be phasing out GitHub Issues as the feedback mechanism for content and replacing it with a new feedback system. For more information see: https://aka.ms/ContentUserFeedback.
Submit and view feedback for