Shielded VMs - Hosting service provider sets up Windows Azure Pack
This topic describes how a hosting service provider can configure Windows Azure Pack so that tenants can use it to deploy shielded VMs. Windows Azure Pack is a web portal that extends the functionality of System Center Virtual Machine Manager to allow tenants to deploy and manage their own VMs through a simple web interface. Windows Azure Pack fully supports shielded VMs and makes it even easier for your tenants to create and manage their shielding data files.
To understand how this topic fits in the overall process of deploying shielded VMs, see Hosting service provider configuration steps for guarded hosts and shielded VMs.
Setting up Windows Azure Pack
You will complete the following tasks to set up Windows Azure Pack in your environment:
Complete configuration of System Center 2016 - Virtual Machine Manager (VMM) for your hosting fabric. This includes setting up VM templates and a VM cloud, which will be exposed through Windows Azure Pack:
Scenario - Deploy guarded hosts and shielded virtual machines in VMM
Install and configure System Center 2016 - Service Provider Foundation (SPF). This software enables Windows Azure Pack to communicate with your VMM servers:
Install Windows Azure Pack and configure it to communicate with SPF:
- Install Windows Azure Pack (in this topic)
- Configure Windows Azure Pack (in this topic)
Create one or more hosting plans in Windows Azure Pack to allow tenants access to your VM clouds:
Create a plan in Windows Azure Pack (in this topic)
Install Windows Azure Pack
Install and configure Windows Azure Pack (WAP) on the machine where you wish to host the web portal for your tenants. This machine will need to be able to reach the SPF server and be reachable by your tenants.
Reviewing WAP system requirements and install the prerequisite software.
Download and install the Web Platform Installer. If the machine is not connected to the Internet, follow the offline installation instructions.
Open the Web Platform Installer and find Windows Azure Pack: Portal and API Express under the Products tab. Click Add, then Install at the bottom of the window.
Proceed through the installation. After the installation completes, the configuration site (https://<wapserver>:30101/) opens in your web browser. On this website, provide information about your SQL server and finish configuring WAP.
For help setting up Windows Azure Pack, see Install an express deployment of Windows Azure Pack.
Note
If you already run Windows Azure Pack in your environment, you may use your existing installation. In order to work with the latest shielded VM features, however, you will need to upgrade your installation to at least Update Rollup 10.
Configure Windows Azure Pack
Before you use Windows Azure Pack, you should already have it installed and configured for your infrastructure.
Navigate to the Windows Azure Pack admin portal at https://<wapserver>:30091, and then log in using your administrator credentials.
In the left pane, click VM Clouds.
Connect Windows Azure Pack to the Service Provider Foundation instance by clicking Register System Center Service Provider Foundation. You will need to specify the URL for Service Provider Foundation, as well as a username and password.
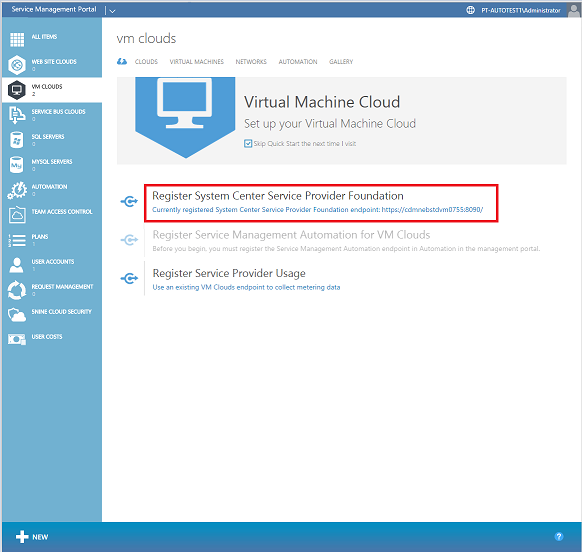
Once completed, you should be able to see the VM clouds set up in your VMM environment. Ensure you have at least one VM cloud that supports shielded VMs available to WAP before continuing.
Create a plan in Windows Azure Pack
In order to allow tenants to create VMs in WAP, you must first create a hosting plan to which tenants can subscribe. Plans define the allowed VM clouds, templates, networks, and billing entities for your tenants.
On the lower pane of the portal, click +NEW > PLAN > CREATE PLAN.
In the first step of the wizard, choose a name for your Plan. This is the name your tenants will see when subscribing.
In the second step, select VIRTUAL MACHINE CLOUDS as one of the services to offer in the plan.
Skip the step about selecting any add-ons for the plan.
Click OK (check mark) to create the plan. Although this creates the plan, it is not yet in a configured state.
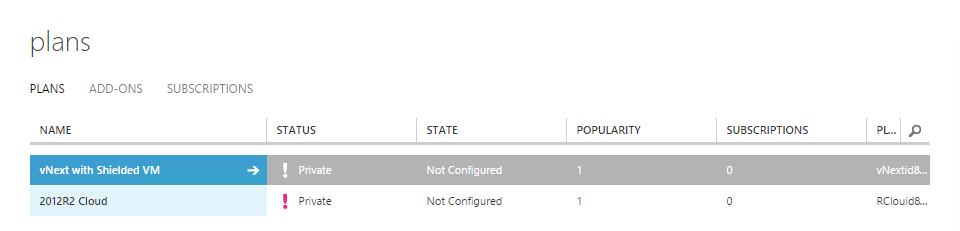
To begin configuring the Plan, click its name.
On the next page, under plan services, click Virtual Machine Clouds. This opens the page where you can configure quotas for this plan.
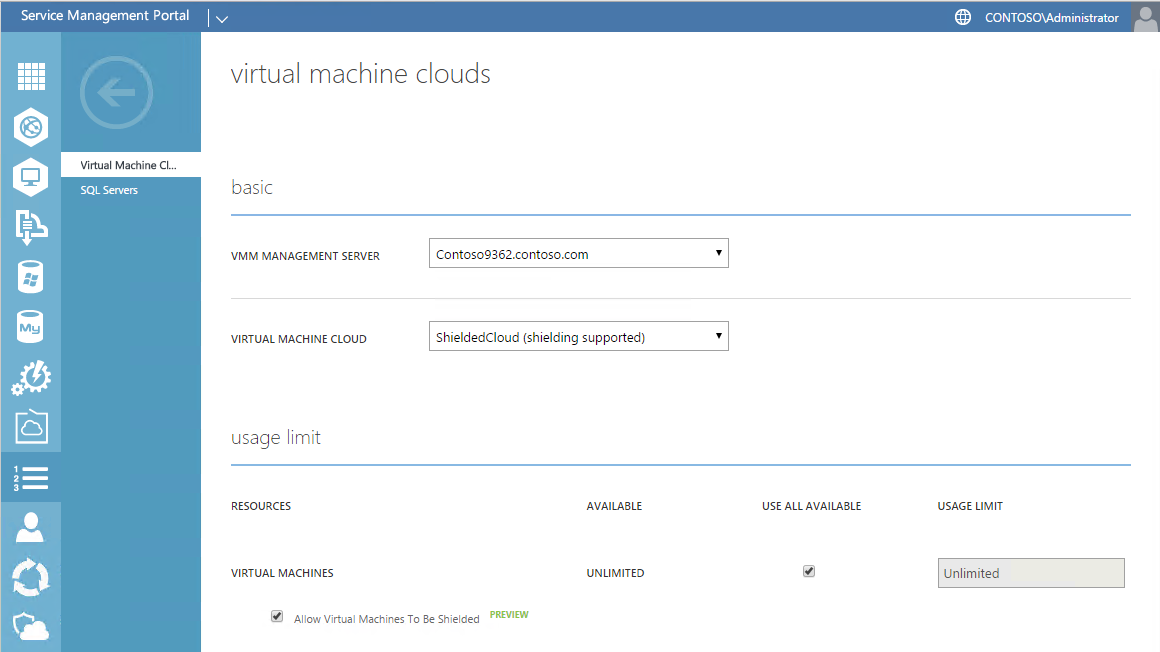
Under basic, select the VMM Management Server and Virtual Machine Cloud you wish to offer to your tenants. Clouds that can offer shielded VMs will be displayed with (shielding supported) next to their name.
Select the quotas you want to apply in this Plan. (For example, limits on CPU core and RAM usage). Make sure to leave the Allow Virtual Machines To Be Shielded checkbox selected.
Scroll down to the section titled templates, and then select one or more templates to offer to your tenants. You can offer both shielded and unshielded templates to tenants, but a shielded template must be offered to give tenants end-to-end assurances about the integrity of the VM and their secrets.
In the networks section, add one or more networks for your tenants.
After setting any other settings or quotas for the Plan, click Save at the bottom.
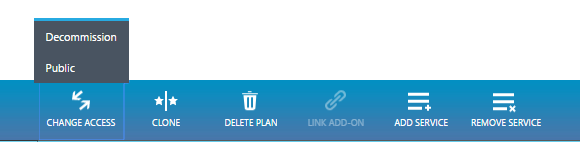
At the top left of the screen, click on the arrow to take you back to the Plan page.
At the bottom of the screen, change the Plan from being Private to Public so that tenants can subscribe to the Plan.
At this point, Windows Azure Pack is configured and tenants will be able to subscribe to the plan you just created and deploy shielded VMs. For additional steps that tenants need to complete, see Shielded VMs for tenants - Deploying a shielded VM by using Windows Azure Pack.
Additional References
Feedback
Coming soon: Throughout 2024 we will be phasing out GitHub Issues as the feedback mechanism for content and replacing it with a new feedback system. For more information see: https://aka.ms/ContentUserFeedback.
Submit and view feedback for