Appendix H: Securing Local Administrator Accounts and Groups
Applies to: Windows Server 2022, Windows Server 2019, Windows Server 2016, Windows Server 2012 R2, Windows Server 2012
Appendix H: Securing Local Administrator Accounts and Groups
On all versions of Windows currently in mainstream support, the local Administrator account is disabled by default, which makes the account unusable for pass-the-hash and other credential theft attacks. However, in environments that contain legacy operating systems or in which local Administrator accounts have been enabled, these accounts can be used as previously described to propagate compromise across member servers and workstations. Each local Administrator account and group should be secured as described in the step-by-step instructions that follow.
For detailed information about considerations in securing Built-in Administrator (BA) groups, see Implementing Least-Privilege Administrative Models.
Controls for Local Administrator Accounts
For the local Administrator account in each domain in your forest, you should configure the following settings:
- Configure GPOs to restrict the domain's Administrator account's use on domain-joined systems
In one or more GPOs that you create and link to workstation and member server OUs in each domain, add the Administrator account to the following user rights in Computer Configuration\Policies\Windows Settings\Security Settings\Local Policies\User Rights Assignments:
Deny access to this computer from the network
Deny log on as a batch job
Deny log on as a service
Deny log on through Remote Desktop Services
Step-by-Step Instructions to Secure Local Administrators Groups
Configuring GPOs to Restrict Administrator Account on Domain-Joined Systems
In Server Manager, click Tools, and click Group Policy Management.
In the console tree, expand <Forest>\Domains\<Domain>, and then Group Policy Objects (where <Forest> is the name of the forest and <Domain> is the name of the domain where you want to set the Group Policy).
In the console tree, right-click Group Policy Objects, and click New.

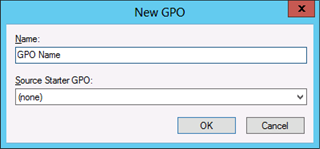
In the New GPO dialog box, type <GPO Name>, and click OK (where <GPO Name> is the name of this GPO).
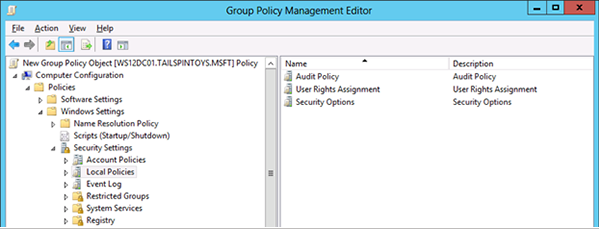
In the details pane, right-click <GPO Name>, and click Edit.
Navigate to Computer Configuration\Policies\Windows Settings\Security Settings\Local Policies, and click User Rights Assignment.
Configure the user rights to prevent the local Administrator account from accessing members servers and workstations over the network by doing the following:
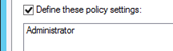
Double-click Deny access to this computer from the network and select Define these policy settings.
Click Add User or Group, type the user name of the local Administrator account, and click OK. This user name will be Administrator, the default when Windows is installed.

Click OK.
Important
When you add the Administrator account to these settings, you specify whether you are configuring a local Administrator account or a domain Administrator account by how you label the accounts. For example, to add the TAILSPINTOYS domain's Administrator account to these deny rights, you would browse to the Administrator account for the TAILSPINTOYS domain, which would appear as TAILSPINTOYS\Administrator. If you type Administrator in these user rights settings in the Group Policy Object Editor, you will restrict the local Administrator account on each computer to which the GPO is applied, as described earlier.
Configure the user rights to prevent the local Administrator account from logging on as a batch job by doing the following:
Double-click Deny log on as a batch job and select Define these policy settings.
Click Add User or Group, type the user name of the local Administrator account, and click OK. This user name will be Administrator, the default when Windows is installed.
Click OK.
Important
When you add the Administrator account to these settings, you specify whether you are configuring local Administrator account or domain Administrator account by how you label the accounts. For example, to add the TAILSPINTOYS domain's Administrator account to these deny rights, you would browse to the Administrator account for the TAILSPINTOYS domain, which would appear as TAILSPINTOYS\Administrator. If you type Administrator in these user rights settings in the Group Policy Object Editor, you will restrict the local Administrator account on each computer to which the GPO is applied, as described earlier.
Configure the user rights to prevent the local Administrator account from logging on as a service by doing the following:
Double-click Deny log on as a service and select Define these policy settings.
Click Add User or Group, type the user name of the local Administrator account, and click OK. This user name will be Administrator, the default when Windows is installed.

Click OK.
Important
When you add the Administrator account to these settings, you specify whether you are configuring local Administrator account or domain Administrator account by how you label the accounts. For example, to add the TAILSPINTOYS domain's Administrator account to these deny rights, you would browse to the Administrator account for the TAILSPINTOYS domain, which would appear as TAILSPINTOYS\Administrator. If you type Administrator in these user rights settings in the Group Policy Object Editor, you will restrict the local Administrator account on each computer to which the GPO is applied, as described earlier.
Configure the user rights to prevent the local Administrator account from accessing member servers and workstations via Remote Desktop Services by doing the following:
Double-click Deny log on through Remote Desktop Services and select Define these policy settings.
Click Add User or Group, type the user name of the local Administrator account, and click OK. This user name will be Administrator, the default when Windows is installed.

Click OK.
Important
When you add the Administrator account to these settings, you specify whether you are configuring local Administrator account or domain Administrator account by how you label the accounts. For example, to add the TAILSPINTOYS domain's Administrator account to these deny rights, you would browse to the Administrator account for the TAILSPINTOYS domain, which would appear as TAILSPINTOYS\Administrator. If you type Administrator in these user rights settings in the Group Policy Object Editor, you will restrict the local Administrator account on each computer to which the GPO is applied, as described earlier.
To exit Group Policy Management Editor, click File, and click Exit.
In Group Policy Management, link the GPO to the member server and workstation OUs by doing the following:
Navigate to the <Forest>\Domains\<Domain> (where <Forest> is the name of the forest and <Domain> is the name of the domain where you want to set the Group Policy).
Right-click the OU that the GPO will be applied to and click Link an existing GPO.
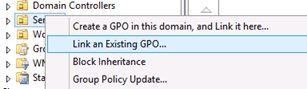
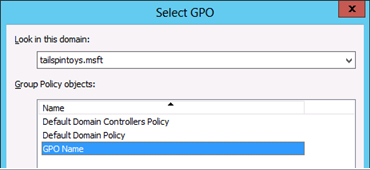
Select the GPO that you created and click OK.
Create links to all other OUs that contain workstations.
Create links to all other OUs that contain member servers.
Verification Steps
Verify "Deny access to this computer from the network" GPO Settings
From any member server or workstation that is not affected by the GPO changes (such as a jump server), attempt to access a member server or workstation over the network that is affected by the GPO changes. To verify the GPO settings, attempt to map the system drive by using the NET USE command.
Log on locally to any member server or workstation that is not affected by the GPO changes.
With the mouse, move the pointer into the upper-right or lower-right corner of the screen. When the Charms bar appears, click Search.
In the Search box, type command prompt, right-click Command Prompt, and then click Run as administrator to open an elevated command prompt.
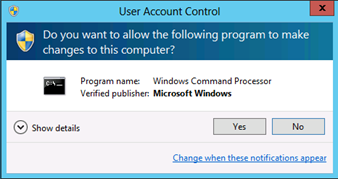
When prompted to approve the elevation, click Yes.
In the Command Prompt window, type
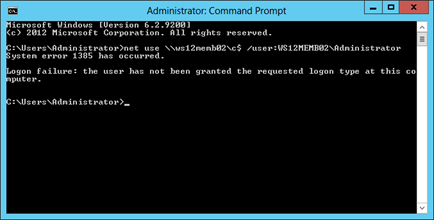
net use \\<Server Name>\c$ /user:<Server Name>\Administrator, where <Server Name> is the name of the member server or workstation you're attempting to access over the network.Note
The local Administrator credentials must be from the same system you're attempting to access over the network.
The following screenshot shows the error message that should appear.
Verify "Deny log on as a batch job" GPO Settings
From any member server or workstation affected by the GPO changes, log on locally.
Create a Batch File
With the mouse, move the pointer into the upper-right or lower-right corner of the screen. When the Charms bar appears, click Search.
In the Search box, type notepad, and click Notepad.
In Notepad, type dir c:.
Click File, and click Save As.
In the File name box, type
<Filename>.bat(where <Filename> is the name of the new batch file).
Schedule a Task
With the mouse, move the pointer into the upper-right or lower-right corner of the screen. When the Charms bar appears, click Search.
In the Search box, type task scheduler, and click Task Scheduler.
Note
On computers running Windows 8, in the Search box, type schedule tasks, and click Schedule tasks.
Click Action, and click Create Task.
In the Create Task dialog box, type <Task Name> (where <Task Name> is the name of the new task).
Click the Actions tab, and click New.
In the Action field, click Start a program.
In the Program/script field, click Browse, locate and select the batch file created in the Create a Batch File section, and click Open.
Click OK.
Click the General tab.
In the Security options field, click Change User or Group.
Type the name of the system's local Administrator account, click Check Names, and click OK.
Select Run whether the user is logged on or not and Do not store password. The task will only have access to local computer resources.
Click OK.
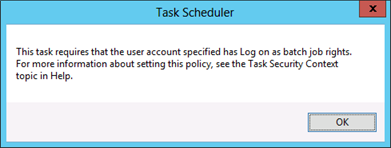
A dialog box should appear, requesting user account credentials to run the task.
After entering the credentials, click OK.
A dialog box similar to the following should appear.
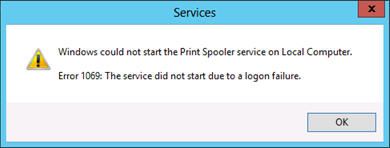
Verify "Deny log on as a service" GPO Settings
From any member server or workstation affected by the GPO changes, log on locally.
With the mouse, move the pointer into the upper-right or lower-right corner of the screen. When the Charms bar appears, click Search.
In the Search box, type services, and click Services.
Locate and double-click Print Spooler.
Click the Log On tab.
In Log on as field, click This account.
Click Browse, type the system's local Administrator account, click Check Names, and click OK.
In the Password and Confirm password fields, type the selected account's password, and click OK.
Click OK three more times.
Right-click Print Spooler and click Restart.
When the service is restarted, a dialog box similar to the following should appear.
Revert Changes to the Printer Spooler Service
From any member server or workstation affected by the GPO changes, log on locally.
With the mouse, move the pointer into the upper-right or lower-right corner of the screen. When the Charms bar appears, click Search.
In the Search box, type services, and click Services.
Locate and double-click Print Spooler.
Click the Log On tab.
In the Log on as: field, select Local System Account, and click OK.
Verify "Deny log on through Remote Desktop Services" GPO Settings
With the mouse, move the pointer into the upper-right or lower-right corner of the screen. When the Charms bar appears, click Search.
In the Search box, type remote desktop connection, and click Remote Desktop Connection.
In the Computer field, type the name of the computer that you want to connect to, and click Connect. (You can also type the IP address instead of the computer name.)
When prompted, provide credentials for the system's local Administrator account.
A dialog box similar to the following should appear.

Feedback
Coming soon: Throughout 2024 we will be phasing out GitHub Issues as the feedback mechanism for content and replacing it with a new feedback system. For more information see: https://aka.ms/ContentUserFeedback.
Submit and view feedback for