Microsoft Surface Deployment Accelerator
Microsoft Surface Deployment Accelerator (SDA) automates the creation and configuration of a Microsoft recommended deployment experience by using free Microsoft deployment tools.
Redesigned in April 2020 to simplify and automate deployment of Surface images in a corporate environment, the SDA tool allows you to build a “factory-like” Windows image that you can customize to your organizational requirements.
The open source, script-driven SDA tool leverages the Windows Assessment and Deployment Kit (ADK) for Windows 10, facilitating the creation of Windows images (WIM) in test or production environments. If the latest ADK is not already installed, it will be downloaded and installed when running the SDA tool.
The resulting image closely matches the configuration of Bare Metal Recovery (BMR) images, without any pre-installed applications such as Microsoft Office or the Surface UWP application.
Requirements
- A USB thumb drive at least 16 GB in size. The USB drive will be formatted.
- An .iso file with Windows 10/11 Pro or Windows 10/11 Enterprise. The media creation tool can be used to download Windows 10 or Windows 11 and create an .iso file. For more information, see Download Windows 10.
- A device running Windows 10, version 2004 or later with Internet access.
See the Prerequisites section of the README document for a detailed list of requirements.
How to run the SDA
To run SDA:
Go to SurfaceDeploymentAccelerator on GitHub.
Review the README documentation.
On the SurfaceDeploymentAccelerator page, click the Code button and then select Download ZIP to save the files locally on your computer.
Right-click the .zip file and then click Properties.
On the General tab, select the Unblock checkbox and then click OK.
Extract the .zip file to a location on your hard drive (ex: C:\SDA).
Open an elevated Windows PowerShell prompt and set ExecutionPolicy for the current session to Unrestricted.
Set-ExecutionPolicy -Scope Process -ExecutionPolicy Unrestricted -ForceRun the SDA script specifying parameters for your environment. The script can be used to create images to install Windows 10 or Windows 11 on a variety of Surface devices. For a full list of supported devices, see the Device parameter description in the SDA README article.
For example, the following command will create a bootable USB drive that can be used to install Windows 10 on Surface Hub 2S:
.\CreateSurfaceWindowsImage.ps1 -ISO C:\SDA\enterprise_client.iso -OSSKU Enterprise -DestinationFolder C:\Output -Device SurfaceHub2 -CreateUSB $TrueSample script output is below.
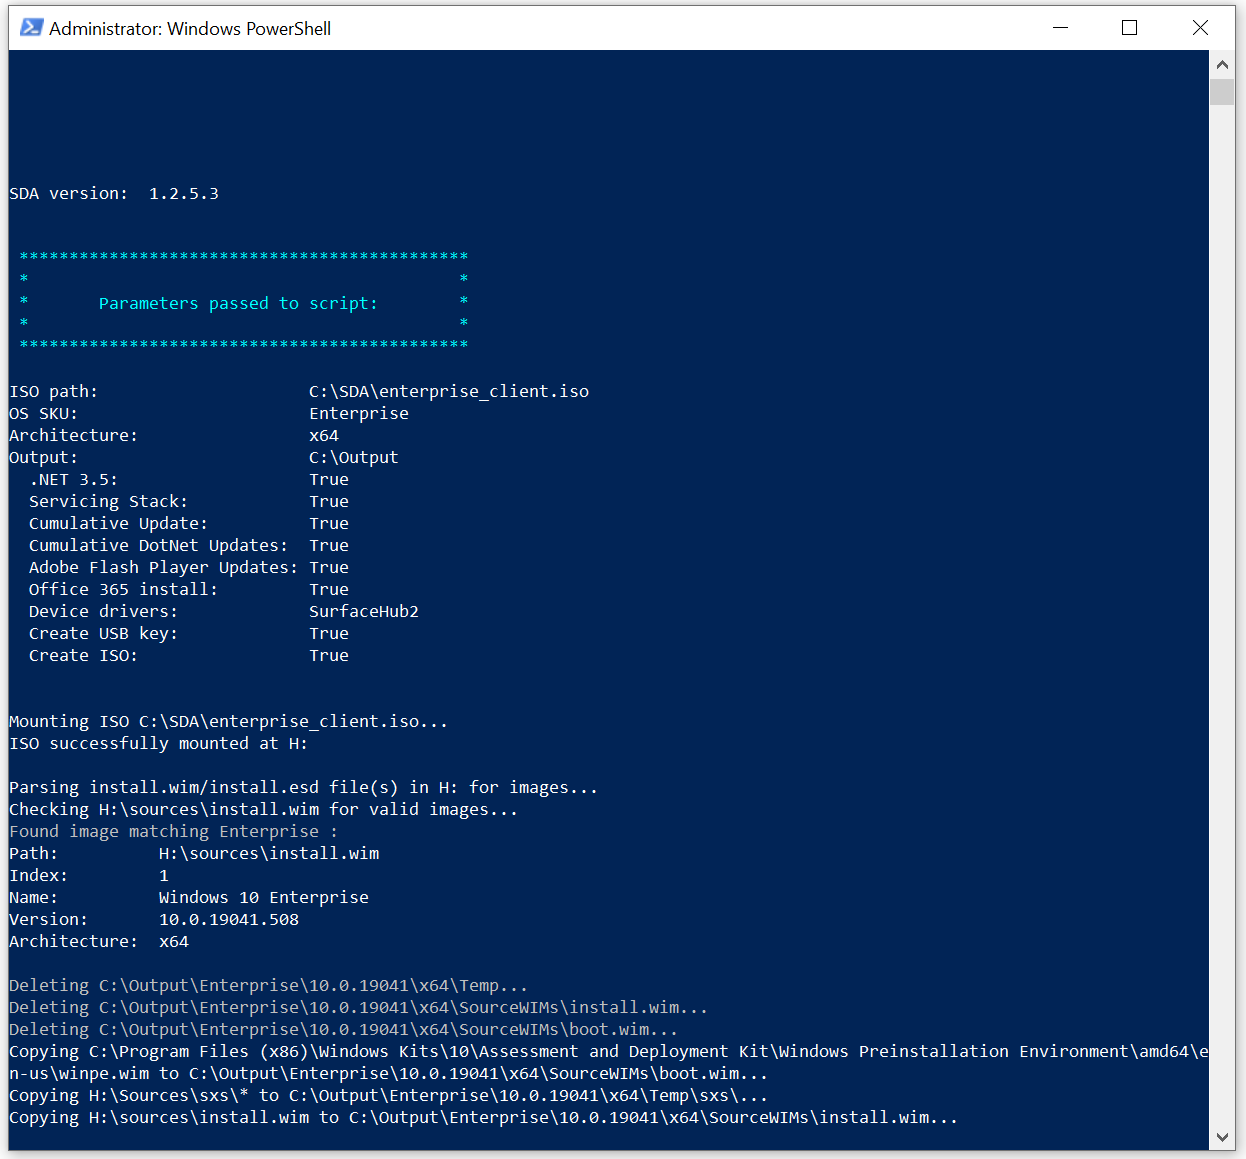
The script will require about 45 minutes to run, but could take longer depending on available CPU and disk resources.
After creating a Windows image, the script will ask you to insert and confirm the drive letter of your USB drive. The USB drive will then be formatted, configured as bootable, and files copied to enable installation of the custom Windows 10 or Windows 11 image for Surface devices.
Insert the USB drive into the device where you want to install Windows 10 or Windows 11 and reboot to begin the installation. USB boot must be enabled in BIOS, which can require that you temporarily disable Secure Boot.
Important
Booting from the USB drive will immediately begin installing the OS. Ensure that your device is ready before inserting the USB and restarting.
Related links
Feedback
Coming soon: Throughout 2024 we will be phasing out GitHub Issues as the feedback mechanism for content and replacing it with a new feedback system. For more information see: https://aka.ms/ContentUserFeedback.
Submit and view feedback for