Configure UEFI settings for Surface devices
This article describes how to secure and manage Unified Extensible Firmware Interface (UEFI) settings for Surface devices deployed across your organization using Surface UEFI Configurator and Surface Enterprise Management Mode (SEMM). The Surface UEFI Configurator, no longer available as a separate download, is now included in the new Surface IT Toolkit.
UEFI settings for SEMM-managed Surface devices
With SEMM, IT admins can manage hardware components at the firmware level. For example, you can turn off hardware components like cameras, microphones, and USB ports for security purposes. For a complete list of available settings, see Surface UEFI SEMM settings reference.
Create a Surface UEFI configuration package
The Surface UEFI configuration package serves the dual purpose of applying newly configured UEFI settings to SEMM-managed Surface devices and enrolling them in SEMM. Creating this package necessitates a SEMM signing certificate to secure the UEFI settings on each device. For more information, see SEMM certificate requirements.
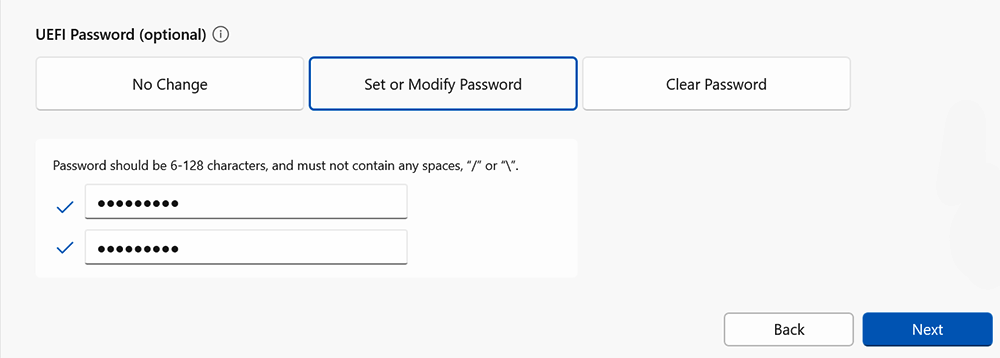
Protect UEFI settings with password
We strongly recommend setting a password when creating UEFI configuration packages. Firmware controls the initial operations of the hardware before the operating system loads. If unauthorized users access UEFI settings, they could potentially disable security features or make changes detrimental to the security and functionality of the device.
Configure device
In the Configure Device tool, you can create UEFI settings configuration and reset packages for Surface devices in your organization (For more information about Surface UEFI settings, see Manage Surface UEFI settings.)
Create a Surface UEFI configuration package
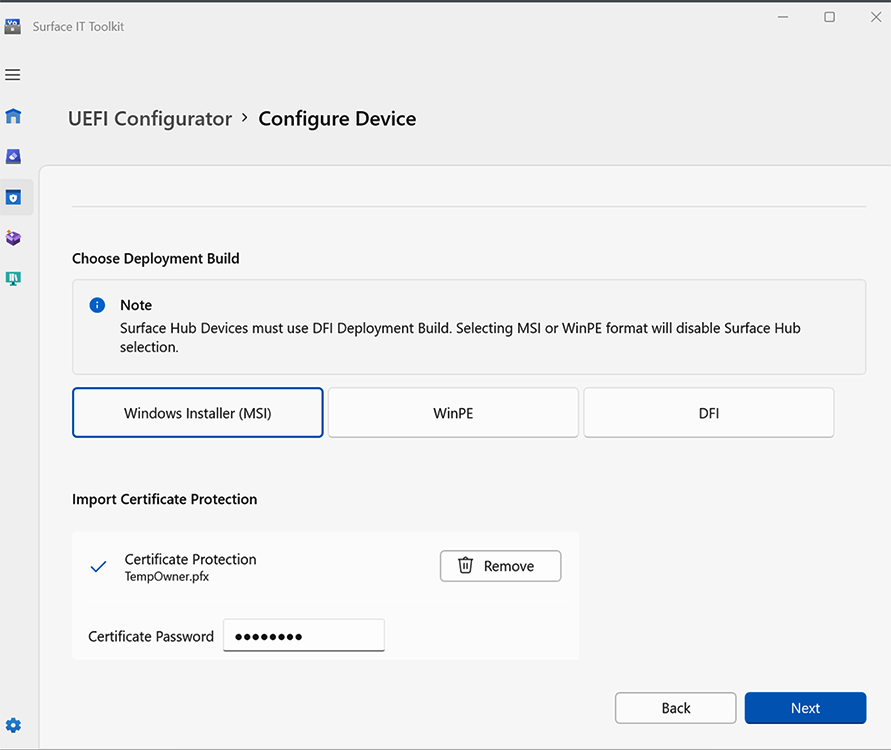
- Open Surface IT Toolkit, select UEFI Configurator > Configure Surface Device.
- Under Import Certificate Protection, select Add to add your exported certificate file with private key (.pfx). Select Next.
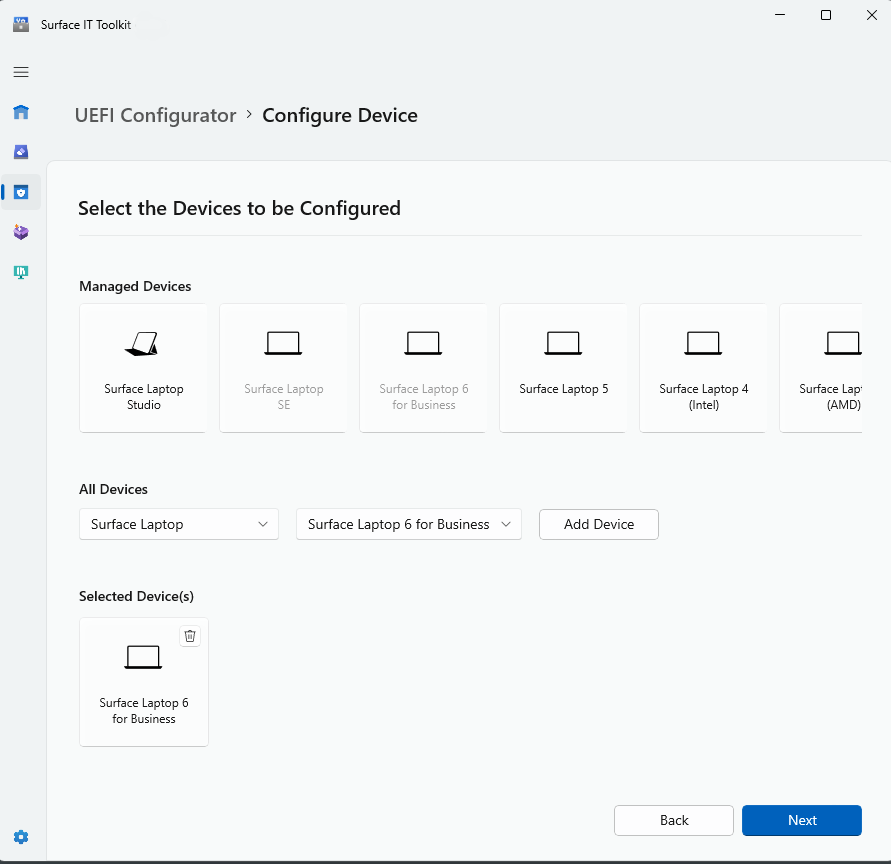
- Select the devices to be configured. Choose from your Managed Devices or go to All Devices to select your device and model. Select Next.
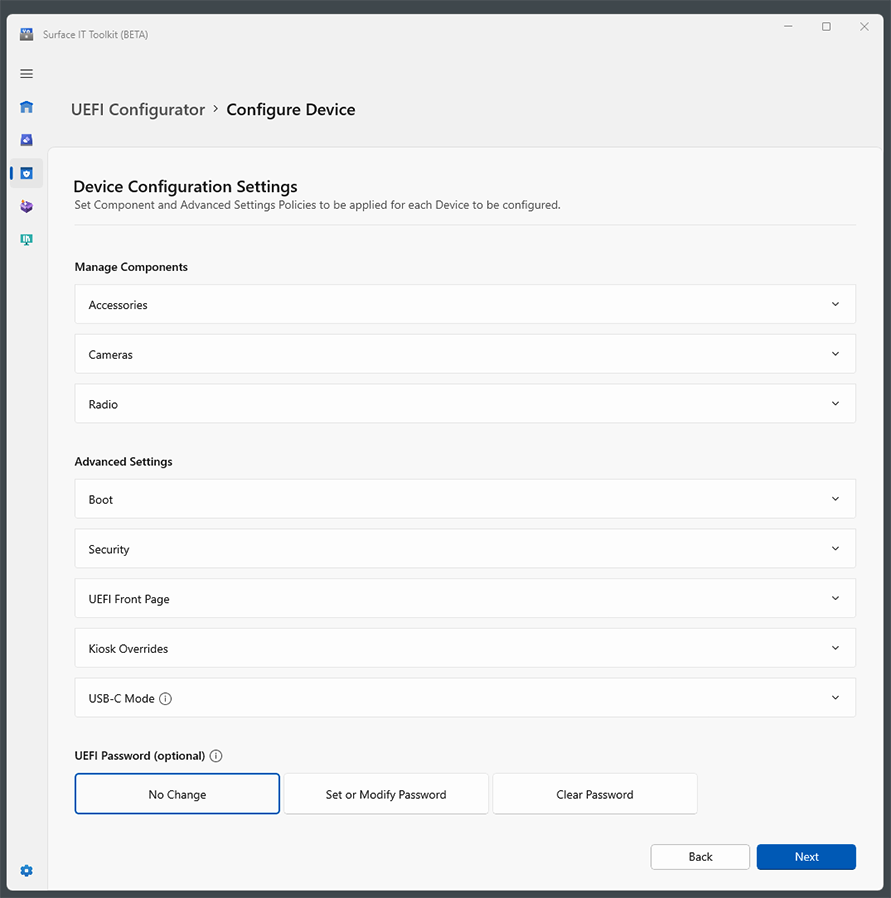
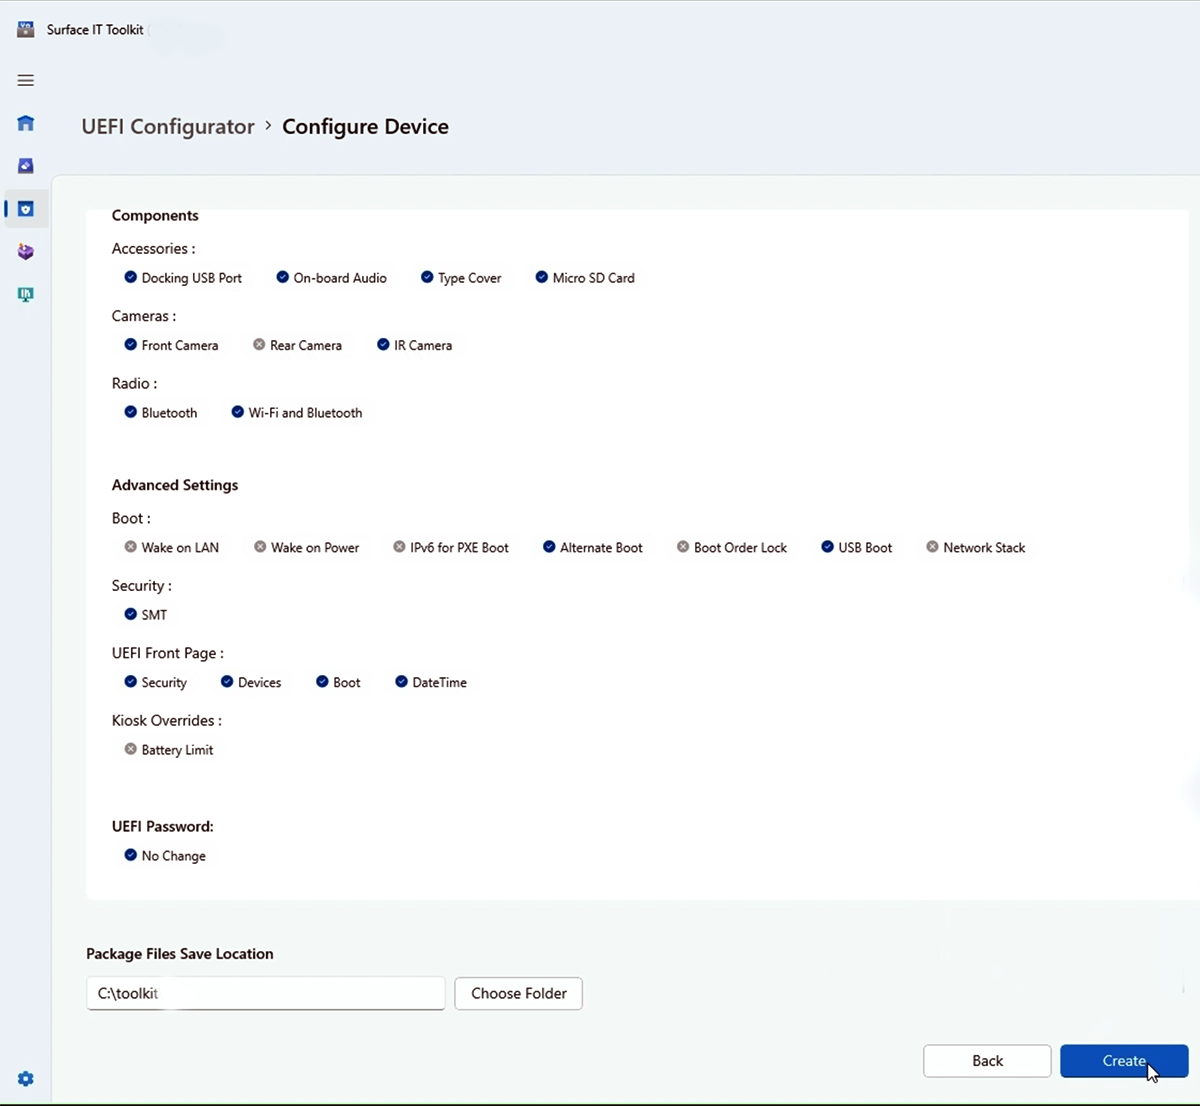
- In the Device Configuration Settings page, select the components you wish to configure and choose a UEFI password setting. When finished, select Next.
- The Final Review page shows selected configuration details. Review your changes, select Choose Folder to save the UEFI configuration package, and select Create.
Tip
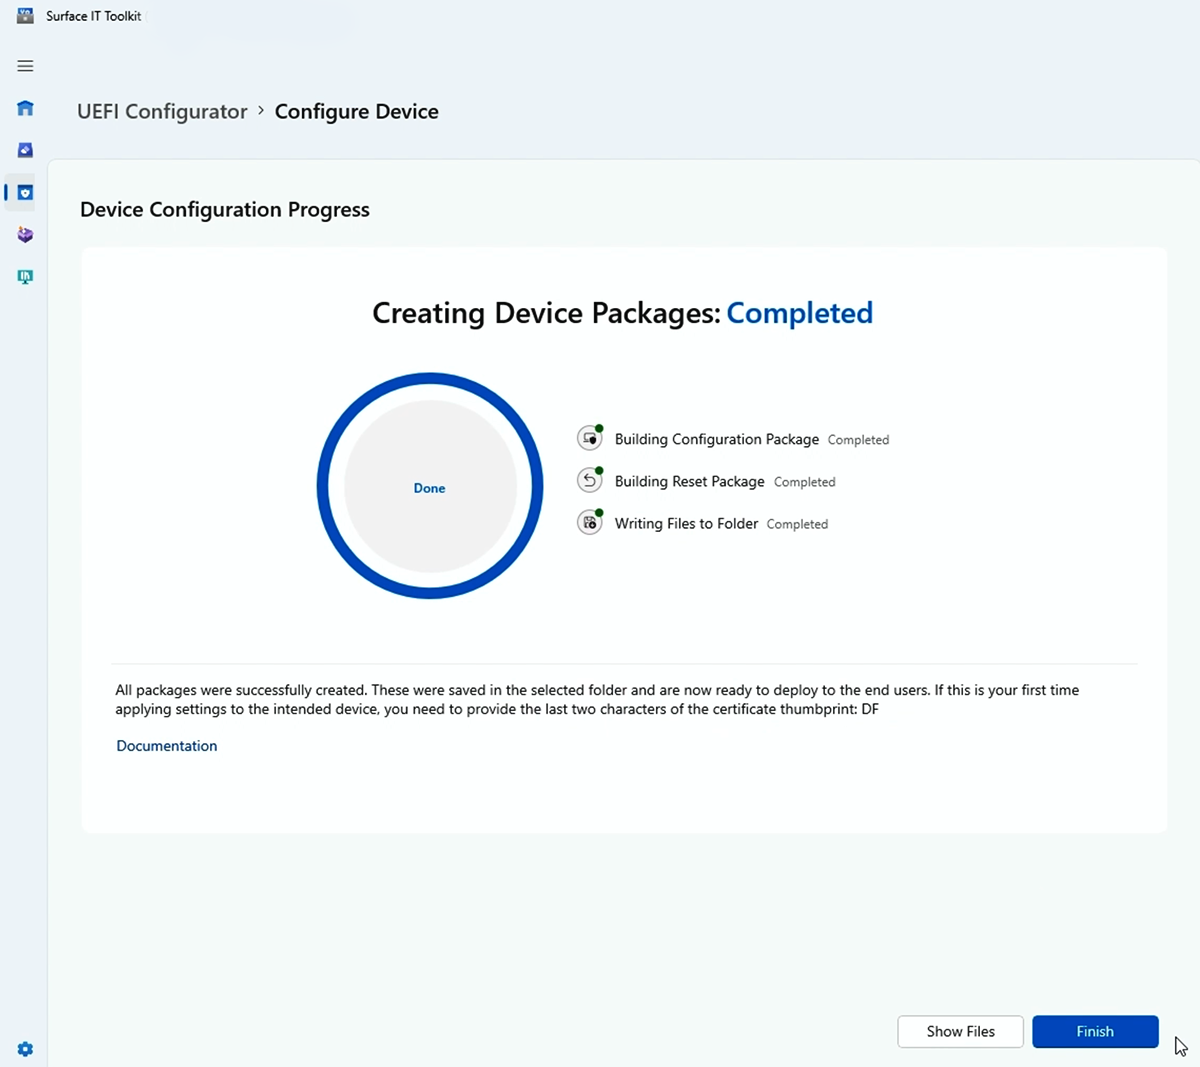
Record the certificate thumbprint characters displayed on this page, as shown in Figure 6. You will need these characters to confirm enrollment of new Surface devices in SEMM. Click End to complete package creation and close Microsoft Surface UEFI Configurator.
When complete, select Finish.
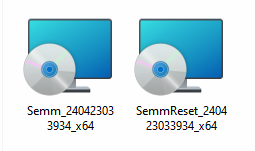
When finished, go to your selected folder to retrieve the package. This example package modifies a single UEFI setting, resulting in two files:
- A SEMM enrollment package you can deploy to one or more devices.
- A Reset package used to unenroll a SEMM-managed device.
Enroll a Surface device in SEMM
When the Surface UEFI configuration package is executed, the SEMM certificate and Surface UEFI configuration files are staged in the firmware storage of the Surface device. When the Surface device reboots, Surface UEFI processes these files and begins the process of applying the Surface UEFI configuration or enrolling the Surface device in SEMM.
Before you enroll a Surface device in SEMM, ensure that you have the last two characters of the certificate thumbprint on hand. You need these characters to confirm the device’s enrollment.
To enroll a Surface device in SEMM with a Surface UEFI configuration package:
- Run the Surface UEFI configuration package .msi file on the Surface device you want to enroll in SEMM. This provisions the Surface UEFI configuration file in the device’s firmware.
- Select the I accept the terms in the License Agreement check box to accept the End User License Agreement (EULA), and select Install to begin the installation process.
- Select Finish to complete the Surface UEFI configuration package installation and restart the Surface device when you're prompted to do so.
- Surface UEFI loads the configuration file and determines that SEMM isn't enabled on the device. Surface UEFI begins the SEMM enrollment process, as follows:
- Surface UEFI verifies that the SEMM configuration file contains a SEMM certificate.
- Surface UEFI prompts you to enter the last two characters of the certificate thumbprint to confirm enrollment of the Surface device in SEMM.
- The Surface device is now enrolled in SEMM.
You can verify if a Surface device is successfully enrolled in SEMM by looking for Microsoft Surface Configuration Package in Programs and Features or in the events stored in the Microsoft Surface UEFI Configurator log, found under Applications and Services Logs in Event Viewer.
Configure more Surface UEFI settings
After a device is enrolled in SEMM, you can run other Surface UEFI configuration packages signed with the same SEMM certificate to apply new Surface UEFI settings. These settings are applied automatically the next time the device boots, without any interaction from the user. You can use application deployment solutions like Microsoft Endpoint Configuration Manager to deploy Surface UEFI configuration packages to Surface devices to change or manage the settings in Surface UEFI.
For more information about how to deploy Windows Installer (.msi) files with Configuration Manager, see Deploy and manage applications with Microsoft Endpoint Configuration Manager.
Feedback
Coming soon: Throughout 2024 we will be phasing out GitHub Issues as the feedback mechanism for content and replacing it with a new feedback system. For more information see: https://aka.ms/ContentUserFeedback.
Submit and view feedback for