Use Disk Cleanup on Windows Server
Applies to: Windows Server 2022, Windows Server 2019, Windows Server 2016, Windows Server 2012 R2, Windows Server 2012, Windows Server 2008 R2
The Disk Cleanup tool clears unnecessary files in a Windows Server environment. This tool is available by default on Windows Server 2019 and Windows Server 2016, but you might have to take a few manual steps to enable it on earlier versions of Windows Server.
To start the Disk Cleanup tool, either run the Cleanmgr.exe file, or select Start > Windows Administrative Tools > Disk Cleanup.
You can also run Disk Cleanup by using the cleanmgr Windows command, and use command-line options to direct Disk Cleanup to clean certain files.
Note
If you're just looking to free up disk space, consider using Azure File Sync with cloud tiering enabled. This method lets you cache your most frequently accessed files locally and tier your least frequently accessed files to the cloud, saving local storage space while maintaining performance. For more information, see Planning for an Azure File Sync deployment.
Enable Disk Cleanup on previous versions of Windows Server
The Disk Cleanup tool (cleanmgr.exe) isn't present by default prior to versions of Windows Server 2016 unless you have the Desktop Experience feature installed. Follow these steps to use the Add Roles and Features Wizard to install the Desktop Experience:
If Server Manager is already open, go to the next step. If Server Manager isn't open yet, launch it by doing one of the following options.
On the Windows desktop, select Server Manager in the Windows taskbar.
On the Windows Start menu, select the Server Manager tile.
On the Manage menu, select Add Roles and Features.
On the Before you begin page, verify that your destination server and network environment are prepared for the feature that you want to install. Select Next.
On the Select installation type page, select Role-based or feature-based installation to install all parts features on a single server. Select Next.
On the Select destination server page, select a server from the server pool, or select an offline VHD. Select Next.
On the Select server roles page, select Next.
On the Select features page, select User Interface and Infrastructure, and then select Desktop Experience.
In Add features that are required for Desktop Experience?, select Add Features.
Finish the installation, and then reboot the system.
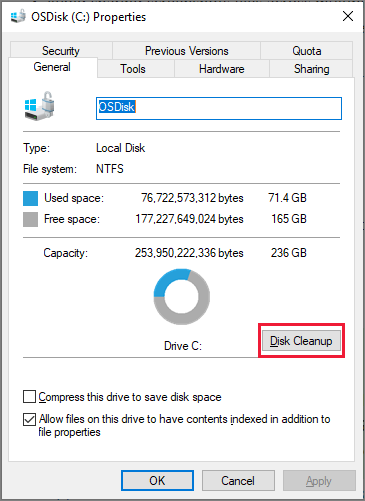
Verify that the Disk Cleanup button appears in the Properties dialog box.
Manually add Disk Cleanup to Windows Server 2008 R2
To use cleanmgr.exe, install the Desktop Experience as described earlier, or copy the two files that are already present on the server, cleanmgr.exe and cleanmgr.exe.mui. Use the following table to locate the files for your operating system.
| Operating System | Architecture | File Location |
|---|---|---|
| Windows Server 2008 R2 | 64-bit | C:\Windows\winsxs\amd64_microsoft-windows-cleanmgr_31bf3856ad364e35_6.1.7600.16385_none_c9392808773cd7da\cleanmgr.exe |
| Windows Server 2008 R2 | 64-bit | C:\Windows\winsxs\amd64_microsoft-windows-cleanmgr.resources_31bf3856ad364e35_6.1.7600.16385_en-us_b9cb6194b257cc63\cleanmgr.exe.mui |
Locate cleanmgr.exe and move the file to %systemroot%\System32.
Locate cleanmgr.exe.mui and move the files to %systemroot%\System32\en-US.
You can launch the Disk Cleanup tool by running Cleanmgr.exe from a Command Prompt window, or by selecting Start and entering Cleanmgr in the search field.
To set up the Disk Cleanup button to appear on a disk's Properties dialog, you need to install the Desktop Experience feature, as shown in the previous section.
Related links
Feedback
Coming soon: Throughout 2024 we will be phasing out GitHub Issues as the feedback mechanism for content and replacing it with a new feedback system. For more information see: https://aka.ms/ContentUserFeedback.
Submit and view feedback for