Windows Autopilot for HoloLens 2
Overview
To deploy at scale, we recommend getting started with Windows Autopilot. It’s considered “low touch” in that it dramatically simplifies setting up HoloLens for both IT and end users.
At a high level, an IT administrator will typically create the business-ready configurations and register HoloLens 2 devices on MDM portals. When HoloLens 2 devices boot with out-of-box experience (OOBE) and connects with the Internet, business-ready configurations for registered HoloLens 2 device are automatically downloaded and applied to make devices business-ready without any user intervention.
For more information, see the Overview of Windows Autopilot | Microsoft Docs article.
Supported autopilot scenario on HoloLens 2
Note
Autopilot configuration for HoloLens in Microsoft Endpoint Manager is transitioning from Public Preview to General Availability. All tenants will be able to setup Autopilot in the MEM admin center.
Starting with Windows Holographic version 2004, HoloLens 2 supports Windows Autopilot Self-Deploying Mode with Microsoft Intune or Ivanti Neurons for MDM (former Mobileiron Cloud). This configuration reduces inventory management overhead, cost of hands-on device preparation and support calls from employees during the setup experience. Learn more in the Windows Autopilot documentation.
Like for Surface devices, it is recommended that customers work with their Microsoft Cloud Solution Provider (reseller or distributor) to get devices registered with the Autopilot service through Partner Center.
When a user starts the Autopilot self-deploying process, Autopilot completes the following steps:
Join the device to Microsoft Entra ID. Autopilot for HoloLens does not support Active Directory join or Microsoft Entra hybrid join.
Use Microsoft Entra ID to enroll the device in Microsoft Endpoint Manager (or another MDM service).
Download and apply device-targeted policies, certificates, networking profiles and applications.
Present the sign-in screen to the user.
Configuring Autopilot for HoloLens 2
Follow the steps below to set up your environment:
(For Intune only) Ensure that MDM enrollment is not blocked for Windows devices.
Create Enrollment Status Page (ESP) configuration and assign it to the device group.
1. Review requirements for Windows Autopilot for HoloLens 2
Review the following sections of the Windows Autopilot requirements article:
Review the "Requirements" section of the Windows Autopilot Self-Deploying mode article. Your environment has to meet these requirements and the standard Windows Autopilot requirements. You do not have to review the "Step by step" and "Validation" sections of the article. The procedures later in this article provide corresponding steps that are specific to HoloLens.
Ensure that the devices are not already members of Microsoft Entra ID, and are not enrolled in Intune (or another MDM system). The Autopilot self-deploying process completes these steps. To make sure that all the device-related information is cleaned up, check the Devices pages in both Microsoft Entra ID and Intune Portals. Convert all targeted devices to Autopilot" feature is not supported on HoloLens at the moment.
Review HoloLens OS requirements:
To confirm the build version on your device or reflash to the latest OS, use the Advanced Recovery Companion (ARC) and our device reflash instructions. Devices delivered until late September 2020 have Windows Holographic version 1903 pre-installed. Contact your reseller to ensure that Autopilot-ready devices are shipped to you.
| Minimum operating system version | Feature supported | Remarks |
|---|---|---|
| Windows Holographic, version 2004 (build 19041.1103) or later | 1. Self-deploying scenario of Autopilot on HoloLens 2. | Autopilot profile download is supported only via Ethernet. Ensure the HoloLens is connected to ethernet using a "USB-C to Ethernet" adapter before turning it on. If you are planning for an Autopilot roll-out to many HoloLens devices, we recommend that you plan for the adapter infrastructure. We do not recommend USB Hubs, as they often require third-party drivers to be installed which is not supported on HoloLens. |
| Windows Holographic, version 20H2 (build 19041.1128) or later | 1. Downloading autopilot profile over Wi-Fi. 2. Tenant lockdown CSP and Autopilot to lock devices with Autopilot specified tenant. |
You may still use ethernet adapters if desired. For devices connected via Wi-fi, the user must only:
|
2. Enable Automatic MDM Enrollment:
In order for Autopilot to succeed you'll need to enable Automatic MDM Enrollment in your Azure portal. This will enable the device to enroll without a user.
Review the following short guide on enabling MDM Automatic Enrollment or the Quickstart automatic enrollment guide for even more information getting set-up.
3. Ensure that MDM enrollment isn't blocked for Windows devices.
In order for Autopilot to succeed you'll need to make sure that your HoloLens devices can enroll. Since HoloLens is considered a Windows device, there will need to be no enrollment restrictions that could block your deployment. Review this list of restrictions and ensure you'll be able to enroll your devices.
4. Register devices in Windows Autopilot
Your devices must be registered in Windows Autopilot before first setup.
There are three primary ways to register HoloLens devices:
Reseller can register devices in the Partner Center when you place an order.
Note
This is the recommended path for adding devices to the Autopilot service. Learn more.
You can submit a support request directly to Microsoft.
Retrieve the hardware hash (also known as the hardware ID) and register the device manually in MEM admin center.
Obtain hardware hash
You can retrieve the hardware hash from the device. The device records its hardware hash in a CSV file during the OOBE process, or later when a device owner starts the diagnostic log collection process (described in the following procedure). Typically, the device owner is the first user to sign in to the device.
Warning
In builds prior to 20H2, if you have gone through OOBE and the telemetry was set to Required, you cannot collect the hardware hash for Autopilot through this method. In order to collect your hardware hash via this method set your telemetry option to Full via the Settings App and select Privacy > Diagnostics.
Start the HoloLens 2 device.
On the device, press the Power and Volume Down buttons at the same time and then release them. The device collects diagnostic logs and the hardware hash, and stores them in a set of .zip files.
- For full details and an instructional video for how to perform this read about Offline Diagnostics.
Use a USB-C cable to connect the device to a computer.
On the computer, open File Explorer. Open This PC\<HoloLens device name>\Internal Storage\Documents, and locate the AutopilotDiagnostics.zip file.
Note
The .zip file may not immediately be available. If the file is not ready yet you may see a HoloLensDiagnostics.temp file in the Documents folder. To update the list of files, refresh the window.
Note
Once the this file has been copied to a PC you may shut down the device. If you do not proceed through OOBE then it may still go through the Autopilot process once set up successfully.
Extract the contents of the AutopilotDiagnostics.zip file.
In the extracted files, locate the CSV file that has a file name prefix of "DeviceHash." Copy that file to a drive on the computer where you can access it later.
Important
The data in the CSV file should use the following header and line format:
Device Serial Number,Windows Product ID,Hardware Hash,Group Tag,Assigned User <serialNumber>,<ProductID>,<hardwareHash>,<optionalGroupTag>,<optionalAssignedUser>
Register device through MEM
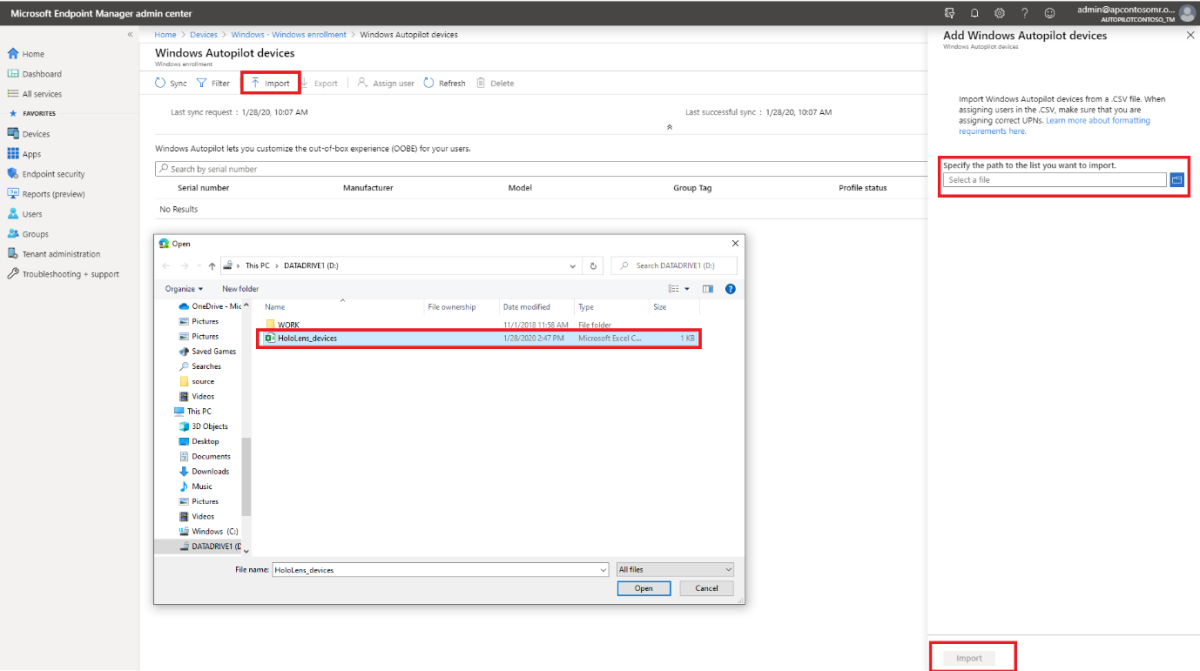
In Microsoft Endpoint Manager admin center, select Devices > Windows > Windows enrollment, and then select Devices > Import under Windows Autopilot Deployment Program.
Under Add Windows Autopilot devices, select the DeviceHash CSV file, select Open, and then select Import.
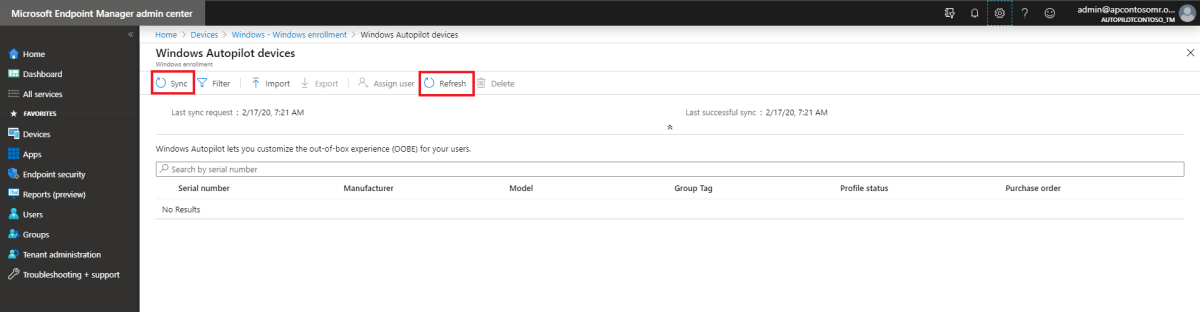
After the import finishes, select Devices > Windows > Windows enrollment > Devices > Sync. The process might take a few minutes to complete, depending on how many devices are being synchronized. To see the registered device, select Refresh.
5. Create a device group
In Microsoft Endpoint Manager admin center, select Groups > New group.
For Group type, select Security, and then enter a group name and description.
For Membership type, select either Assigned or Dynamic Device.
Do one of the following:
If you selected Assigned for Membership type in the previous step, select Members, and then add Autopilot devices to the group. Autopilot devices that aren't yet enrolled are listed by using the device serial number as the device name.
If you selected Dynamic Devices for Membership type in the previous step, select Dynamic device members, and then enter code in Advanced rule that resembles the following:
- If you want to create a group that includes all of your Autopilot devices, type:
(device.devicePhysicalIDs -any _ -contains "[ZTDId]") - Intune's group tag field maps to the OrderID attribute on Microsoft Entra devices. If you want to create a group that includes all of your Autopilot devices that have a specific group tag (the Microsoft Entra device OrderID), you must type:
(device.devicePhysicalIds -any _ -eq "[OrderID]:179887111881") - If you want to create a group that includes all your Autopilot devices that have a specific Purchase Order ID, type:
(device.devicePhysicalIds -any _ -eq "[PurchaseOrderId]:76222342342")
Note
These rules target attributes that are unique to Autopilot devices.
- If you want to create a group that includes all of your Autopilot devices, type:
Select Save, and then select Create.
6. Create autopilot profile and assign it to the device group
In Microsoft Endpoint Manager admin center, select Devices > Windows > Windows enrollment > Windows Autopilot deployment profiles > Create profile > HoloLens.

Enter a profile name and description, and then select Next.
You should see a list that includes HoloLens. If this option is not present, use one of the Feedback options to contact us.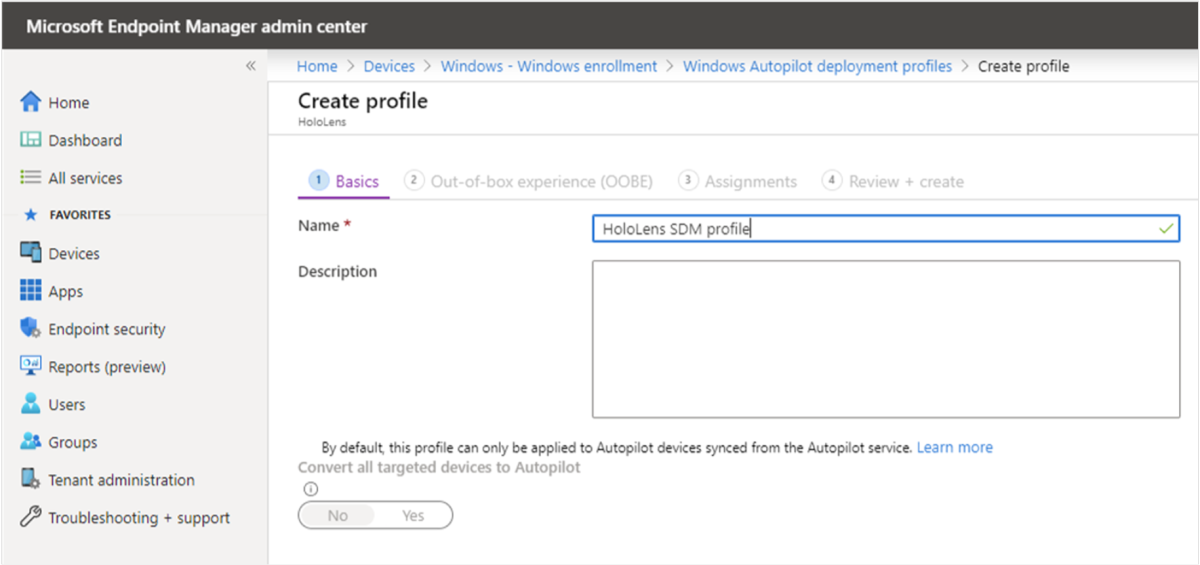
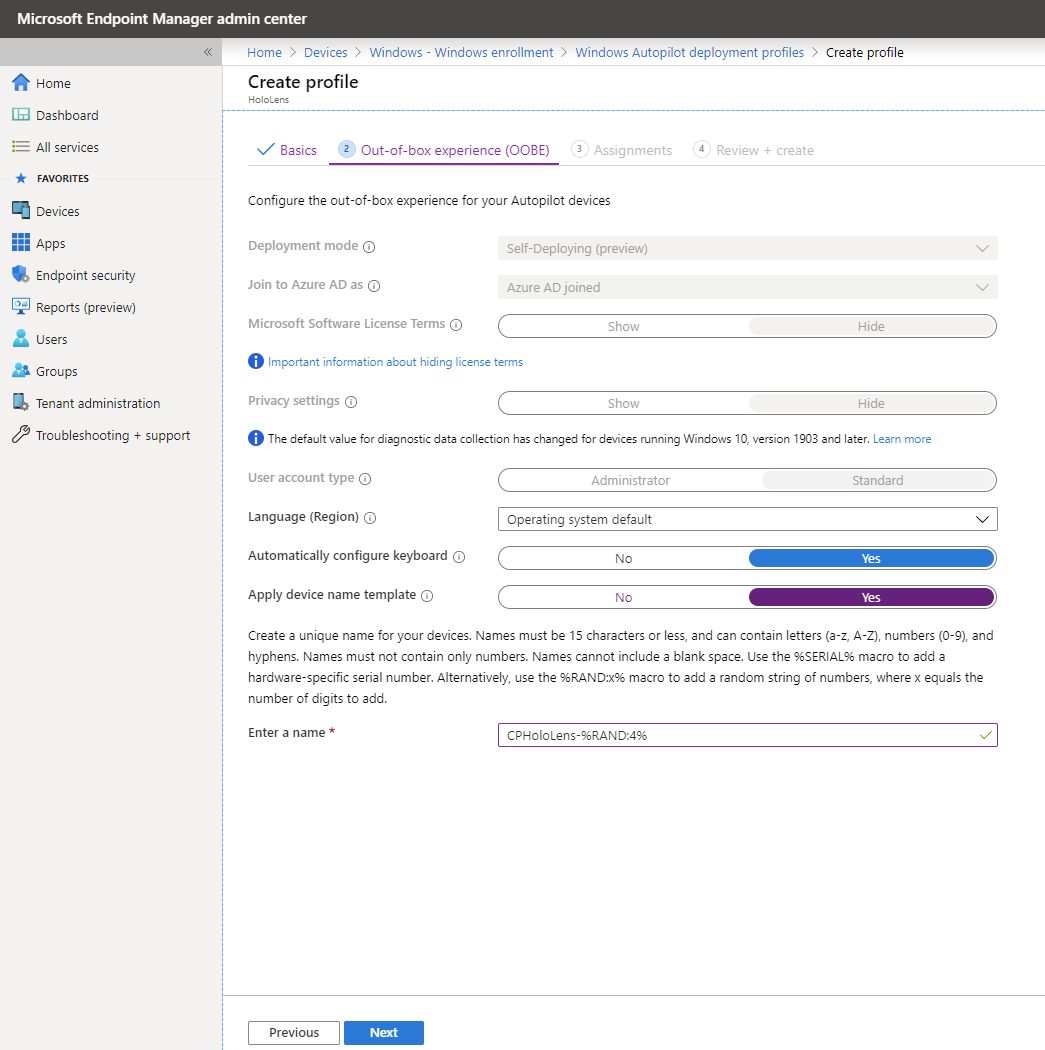
On the Out-of-box experience (OOBE) page, most of the settings are pre-configured to streamline OOBE for this evaluation. Optionally, you can configure the following settings:
- Language (Region): Select the language for OOBE. We recommend that you select a language from the list of supported languages for HoloLens 2.
- Automatically configure keyboard: To make sure that the keyboard matches the selected language, select Yes.
- Apply device name template: To automatically set the device name during OOBE, select Yes and then enter the template phrase and placeholders in Enter a name For example, enter a prefix and
%RAND:4%—a placeholder for a four-digit random number.Note
If you use a device name template, the OOBE process restarts the device one time after it applies the device name and before it joins the device to Microsoft Entra. This restart enables the new name to take effect.
After you configure the settings, select Next.
On the Scope tags page, optionally add the scope tags that you want to apply to this profile. For more information about scope tags, see Use role-based access control and scope tags for distributed IT. When finished, select Next.
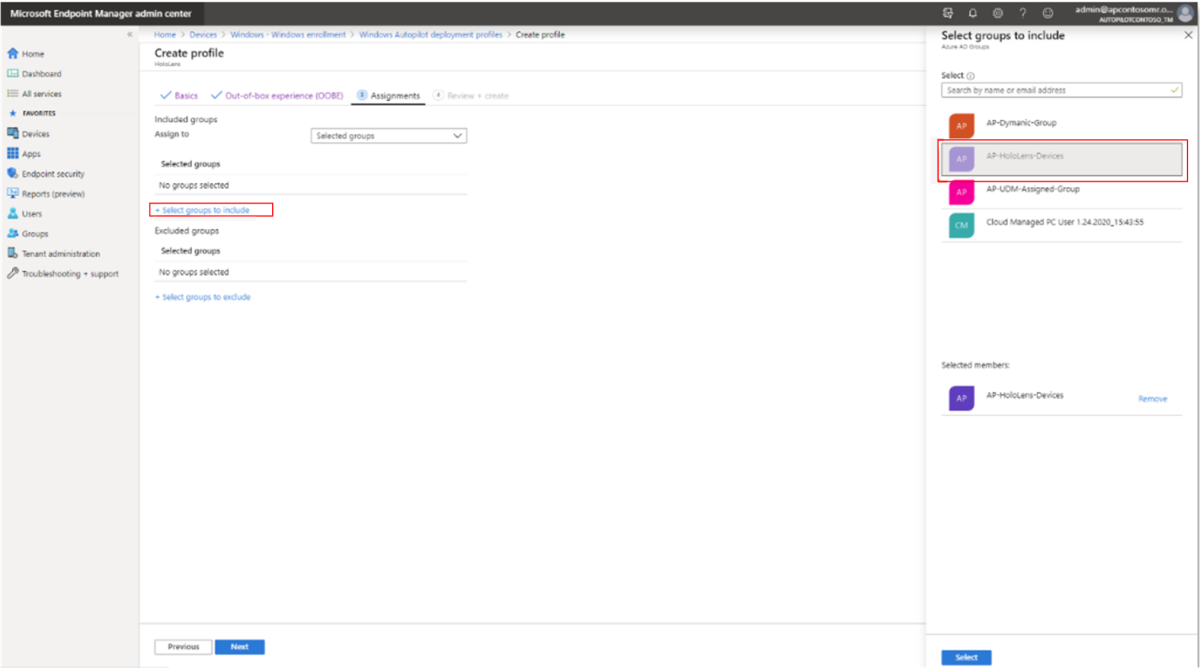
On the Assignments page, select Selected groups for Assign to.
Under SELECTED GROUPS, select + Select groups to include.
In the Select groups to include list, select the device group that you created for the Autopilot HoloLens devices, and then select Next.
If you want to exclude any groups, select Select groups to exclude, and select the groups that you want to exclude.
On the Review + Create page, review the settings and then select Create to create the profile.

7. Create Enrollment Status Page (ESP) configuration and assign it to the device group
The Enrollment Status Page (ESP) displays the status of the complete device configuration process that runs when an MDM-managed user signs into a device for the first time. Make sure that your ESP configuration resembles the following, and verify that the assignments are correct.
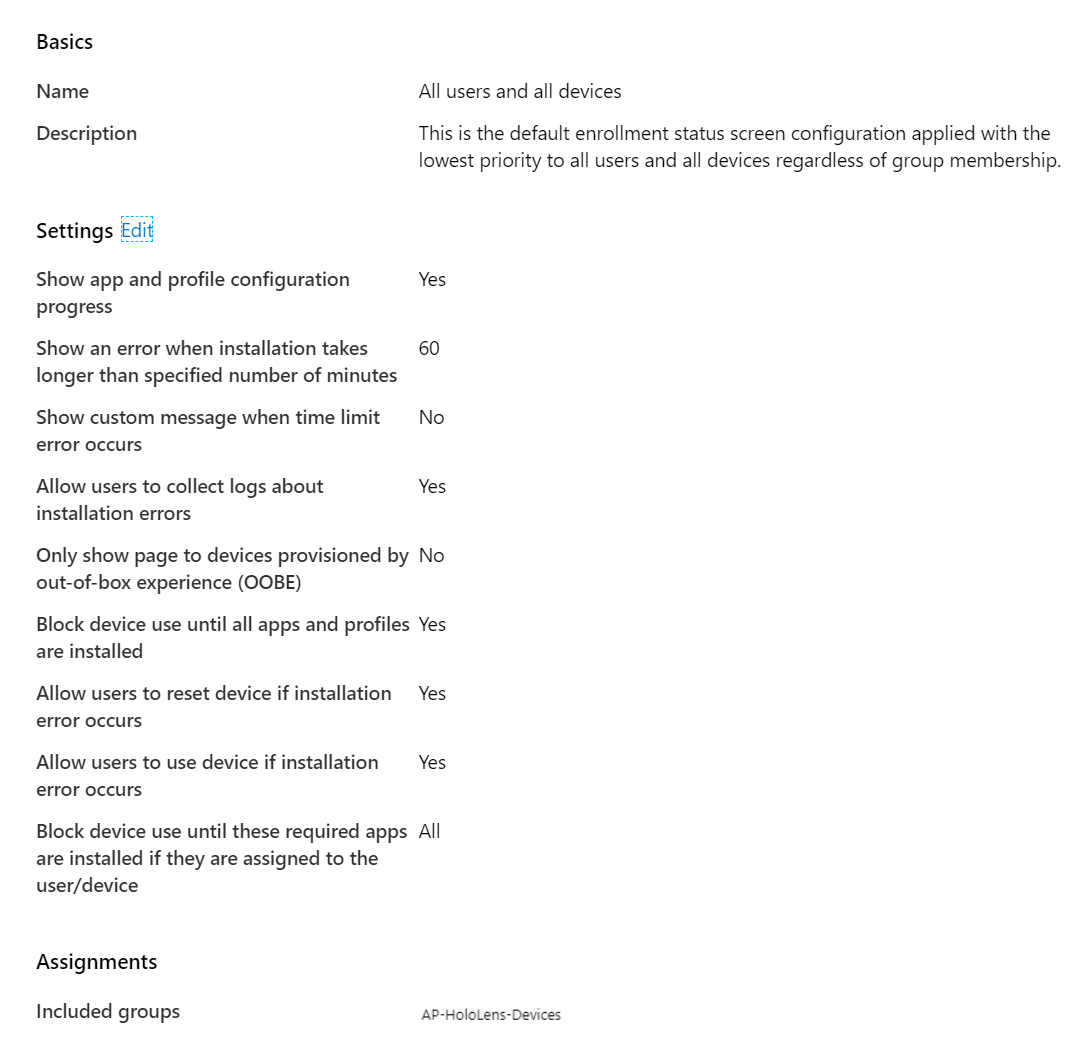
For more information about ESP, refer to Set up the Enrollment Status Page - Microsoft Intune | Microsoft Docs
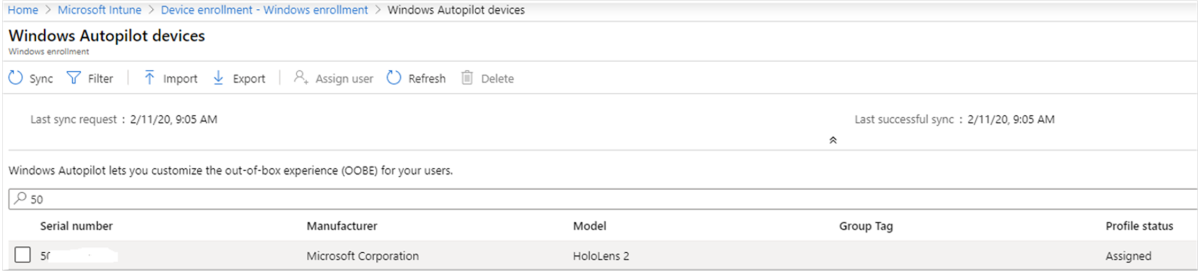
8. Verify the profile status of the HoloLens devices
In Microsoft Endpoint Manager Admin Center, select Devices > Windows > Windows enrollment > Devices.
Verify that the HoloLens devices are listed, and that their profile status is Assigned.
Note
It may take a few minutes for the profile to be assigned to the device.
Windows Autopilot for HoloLens 2 User Experience
Once the above instructions are completed, your HoloLens 2 users will go through the following experience to provision their HoloLens devices:
Autopilot experience requires internet access. Use one of following options to provide internet access:
Connect your device to a Wi-Fi network in OOBE and then let it detect Autopilot experience automatically. This is the only time you will need to interact with OOBE until Autopilot experience completes on its own.
Connect your device with Ethernet using "USB-C to Ethernet" adapters for wired internet connectivity and let HoloLens 2 complete Autopilot experience automatically.
Connect your device with "USB-C to Wi-Fi" adapters for wireless internet connectivity and let HoloLens 2 complete Autopilot experience automatically.
Important
Devices attempting to use Wi-Fi networks in OOBE for Autopilot must be on Windows Holographic, version 20H2 or a newer build.
For devices using ethernet adapters you must connect the device to the network before the Out-of-the-Box-Experience (OOBE) starts. The device determines whether it is provisioning as an Autopilot device while on the first OOBE screen. If the device cannot connect to the network, or if you choose not to provision the device as an Autopilot device, you cannot change to Autopilot provisioning at a later time. Instead, you would have to start this procedure over in order to provision the device as an Autopilot device.
The device should automatically start OOBE. Do not interact with OOBE.
Important
Please do not interact with OOBE or press power button to bring system into standby / shutdown, while autopilot is in progress. This may cause autopilot flow to not complete.
Let HoloLens 2 detect network connectivity and allow it complete OOBE automatically. The device may restart during OOBE. The OOBE screens should resemble the following.
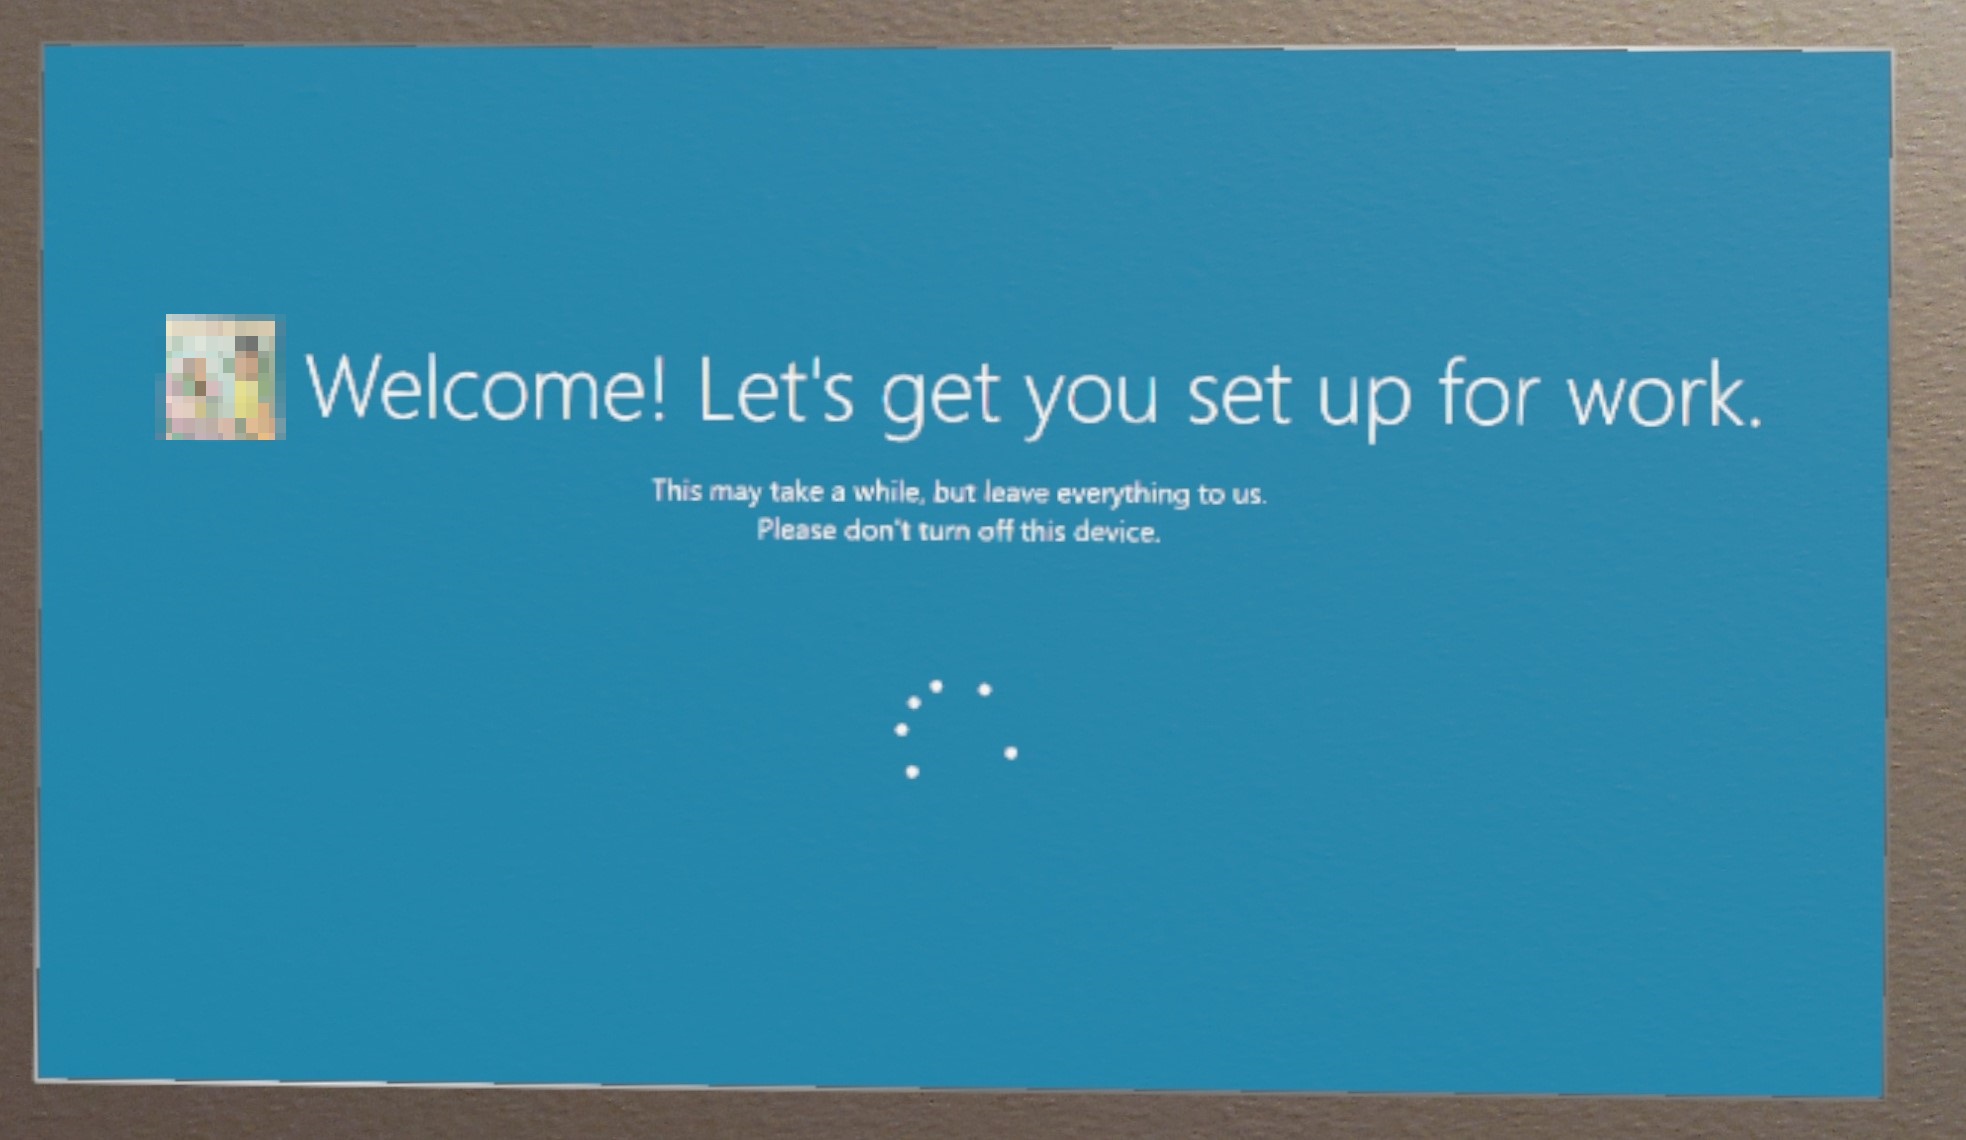
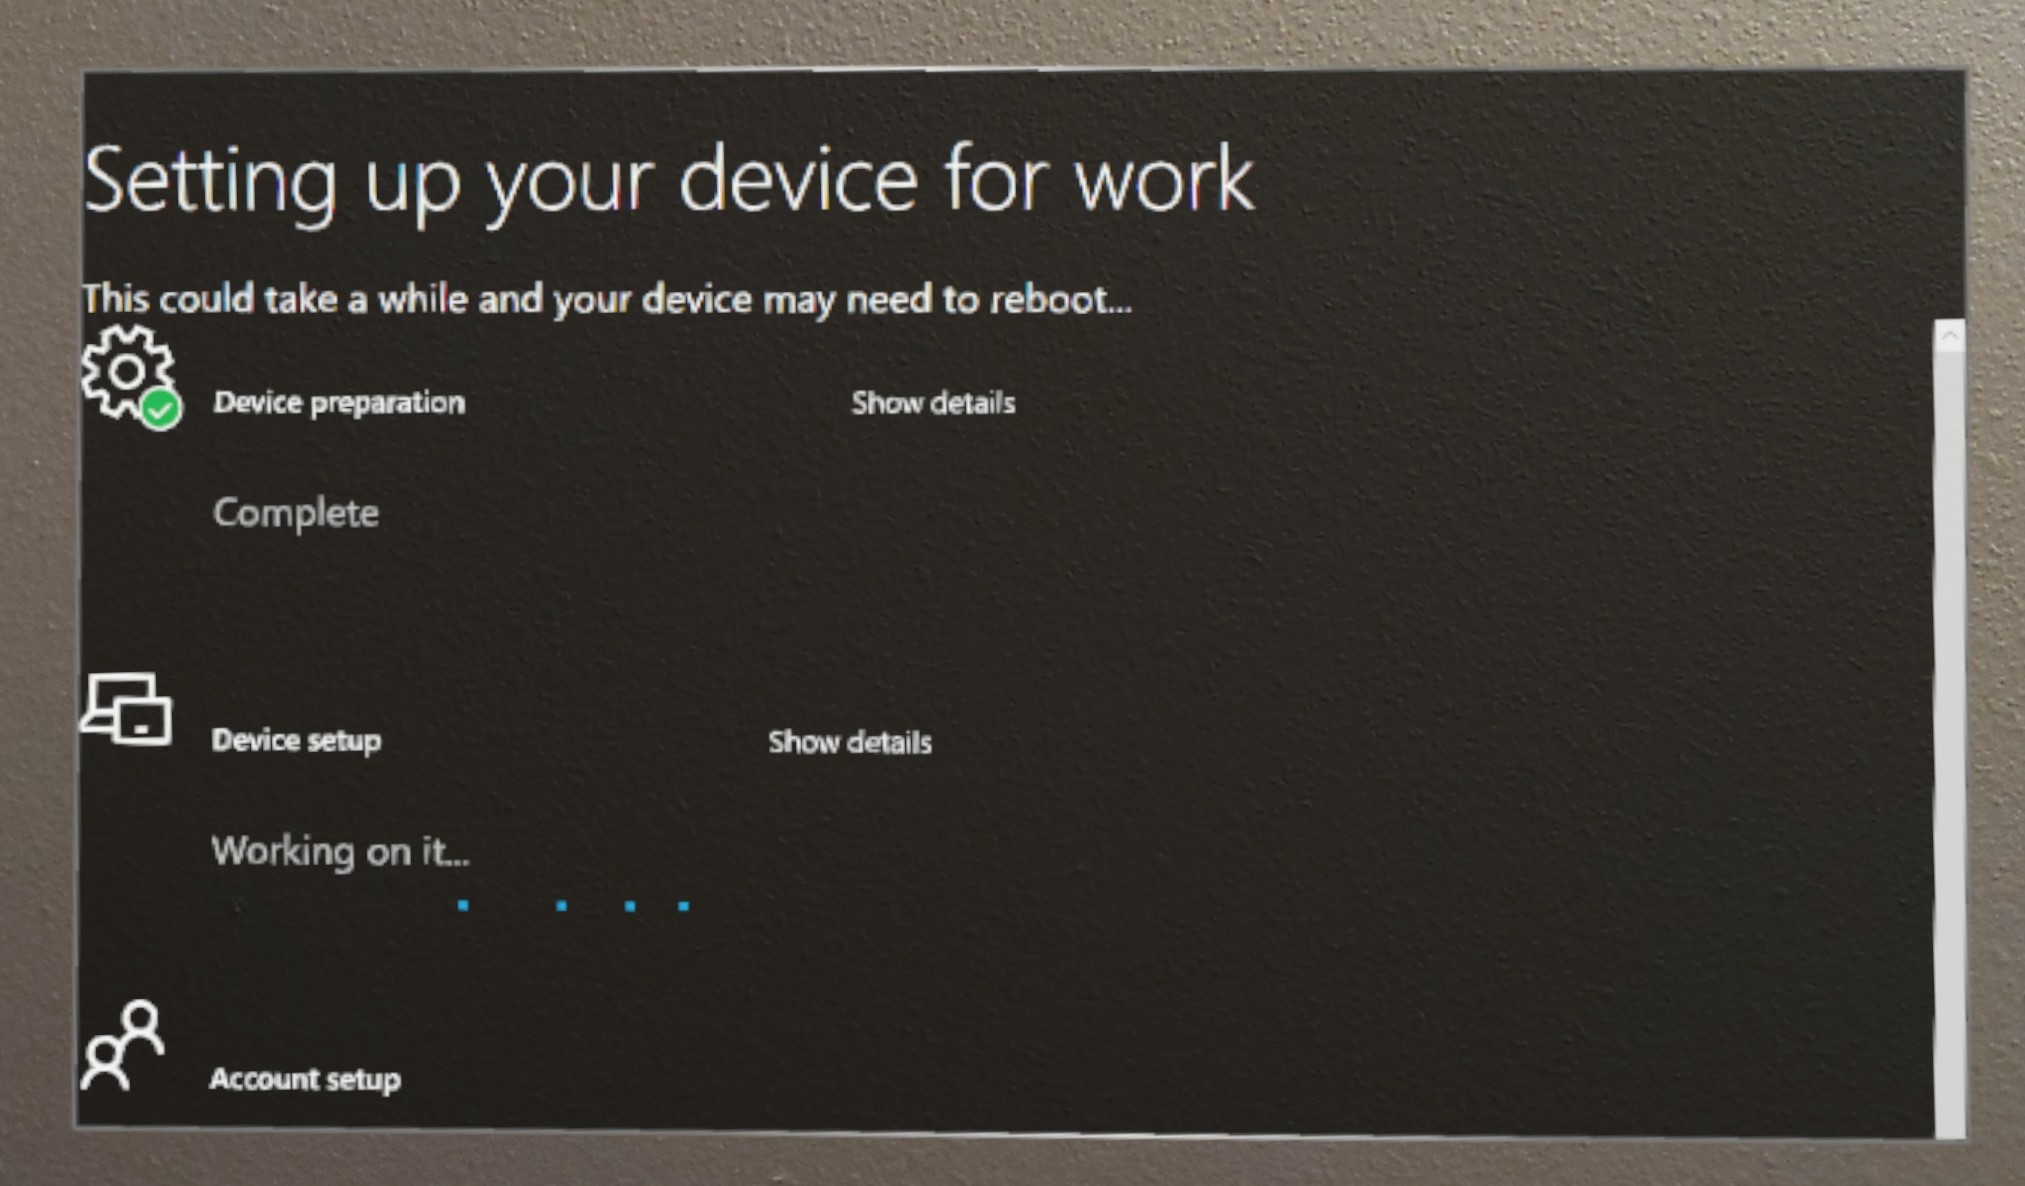
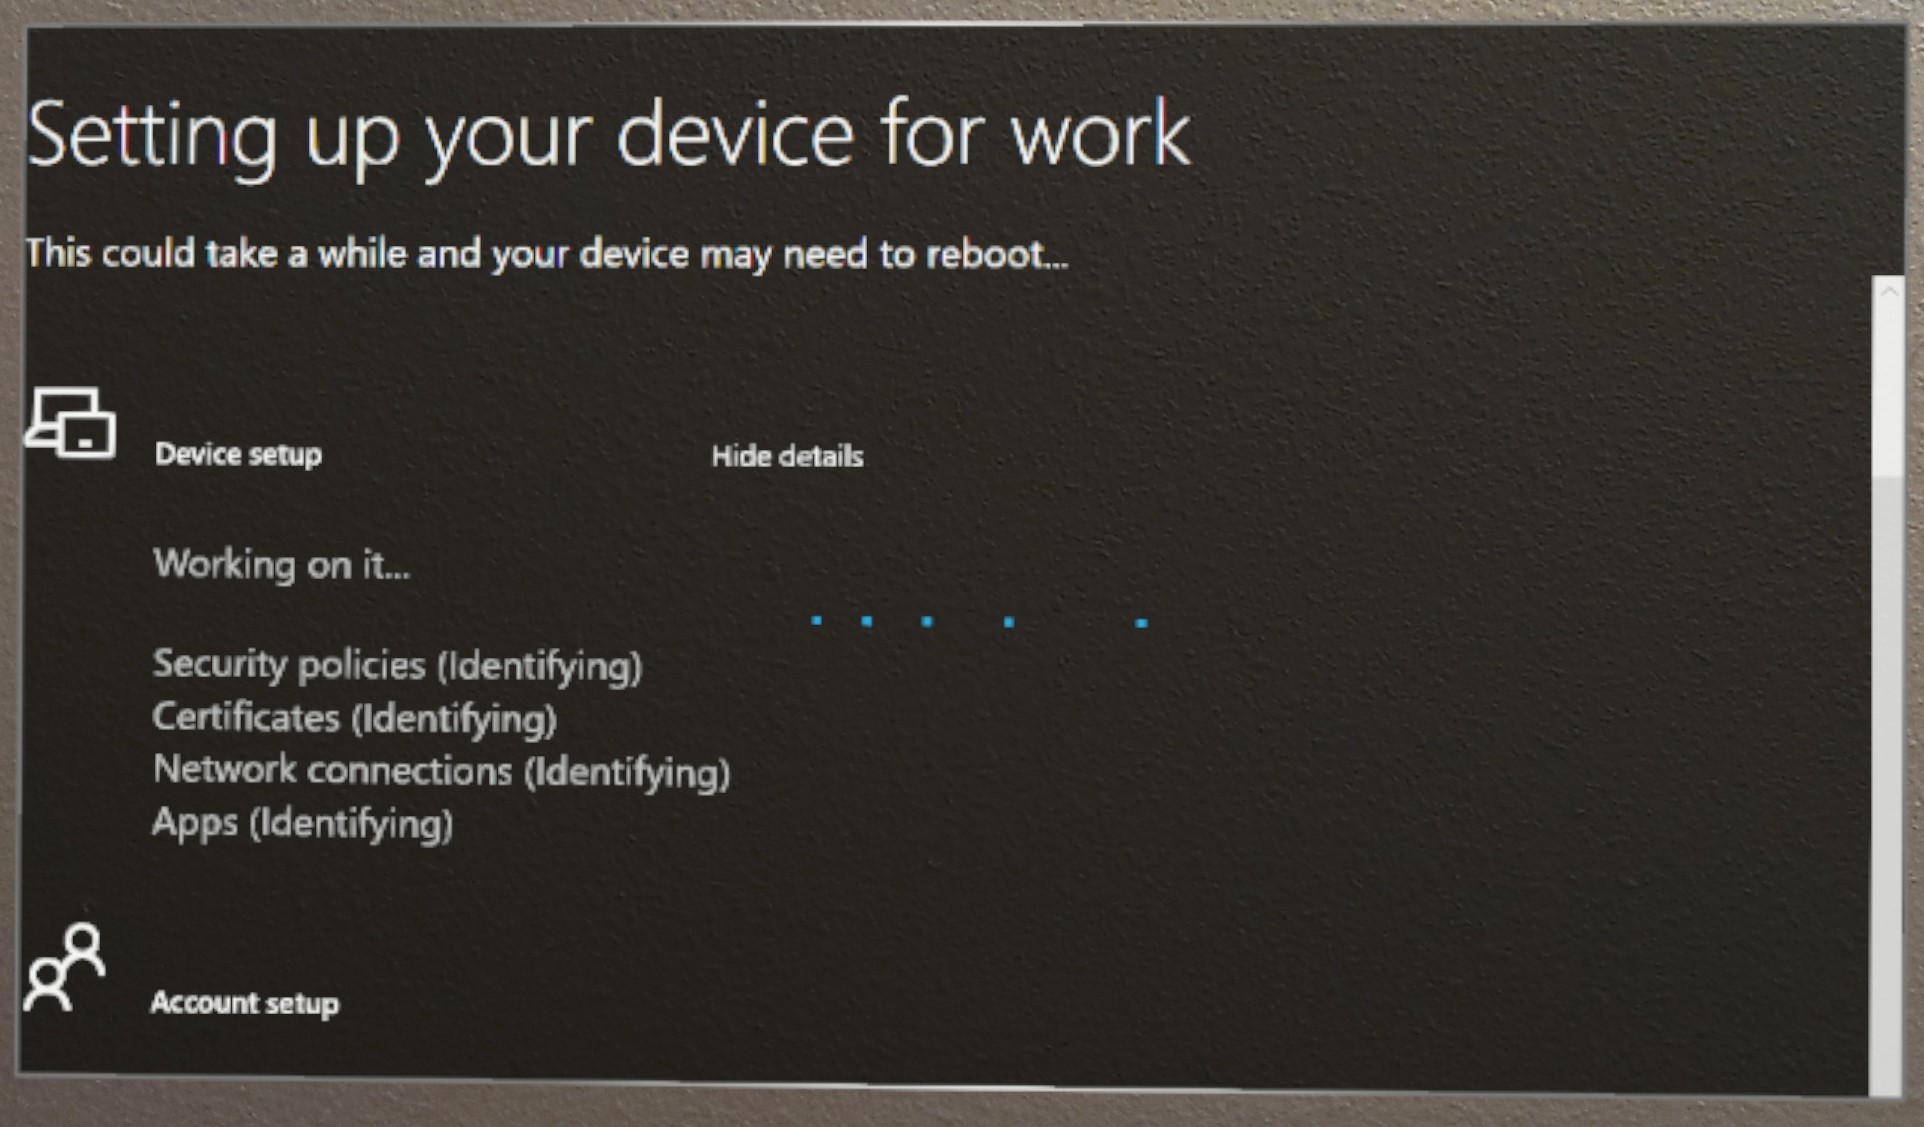
At the end of OOBE, you can sign in to the device by using your user name and password.

Tenant lockdown CSP and Autopilot
HoloLens 2 devices support TenantLockdown CSP as of Windows Holographic, version 20H2. This CSP keeps devices on the organization's tenant by locking them to that tenant even through device reset or reflash.
TenantLockdown CSP enables HoloLens 2 to be tied to MDM enrollment using Autopilot only. Once TenantLockdown CSP’s RequireNetworkInOOBE node is set to either true or false (initially set) value on HoloLens 2, that value remains on the device despite reflashing, OS updates, etc.
Once TenantLockdown CSPs’ RequireNetworkInOOBE node is set to true on HoloLens 2, OOBE waits indefinitely for Autopilot profile to be successfully downloaded and applied, after network connectivity.
Once TenantLockdown CSPs’ RequireNetworkInOOBE node is set to true on HoloLens 2, following operations are disallowed in OOBE:
- Creating local user using runtime provisioning
- Performing Microsoft Entra join operation via runtime provisioning
- Selecting who owns the device in OOBE experience
How to set this using Intune?
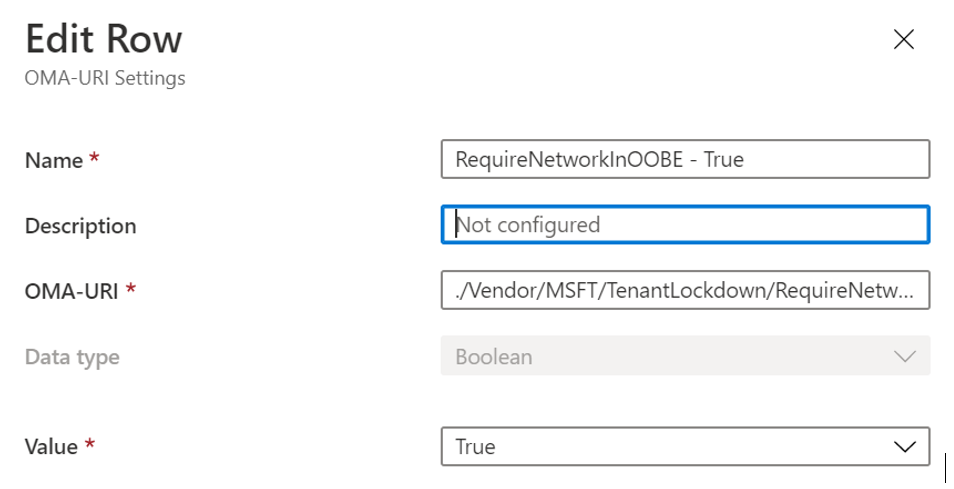
Create a custom OMA URI device configuration profile and specify true for RequireNetworkInOOBE node as shown below. OMA-URI value should be ./Vendor/MSFT/TenantLockdown/RequireNetworkInOOBE
Create a group and assign the device configuration profile to that device group.
Make the HoloLens 2 device member of the group created in previous step and trigger sync.
Verify in the Intune portal that device configuration has been successfully applied. Once this device configuration successfully applies on the HoloLens 2 device, effects of TenantLockdown will be active.
How to unset TenantLockdown’s RequireNetworkInOOBE on HoloLens 2 using Intune?
Remove the HoloLens 2 from the device group to which the device configuration created above was previously assigned.
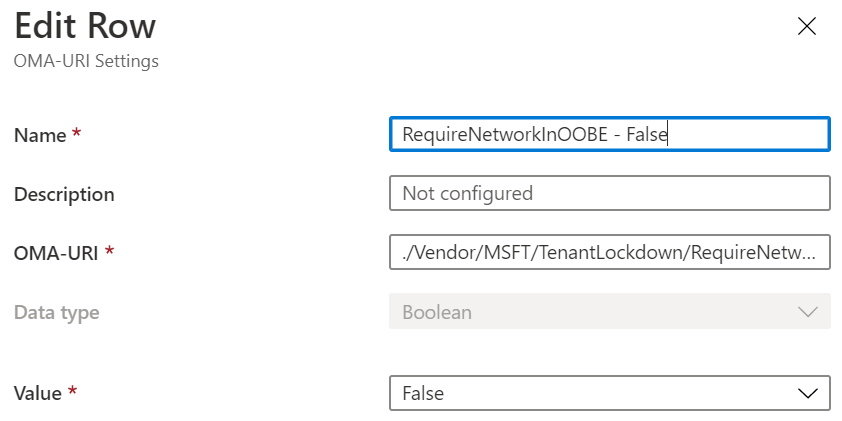
Create a custom OMA URI-based device configuration profile and specify false for RequireNetworkInOOBE as shown below. OMA-URI value should be ./Vendor/MSFT/TenantLockdown/RequireNetworkInOOBE
Create a group and assign the device configuration profile to that device group.
Make the HoloLens 2 device member of the group created in previous step and trigger sync.
Verify in the Intune portal that device configuration has been successfully applied. Once this device configuration successfully applies on the HoloLens 2 device, effects of TenantLockdown will be inactive.
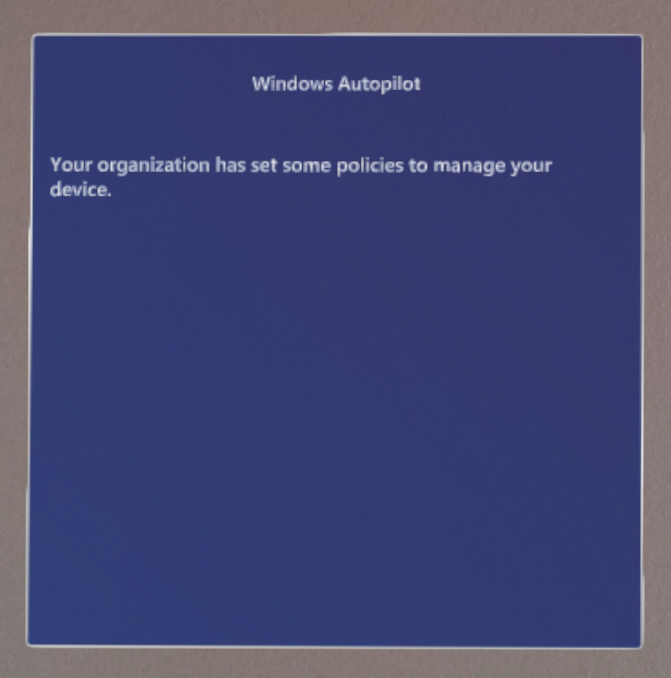
What would happen during OOBE, if Autopilot profile is unassigned on a HoloLens after TenantLockdown was set to true?
OOBE will wait indefinitely for Autopilot profile to download and following dialog will be presented. In order to remove effects of TenantLockdown, device must be enrolled with its original tenant first using Autopilot only and RequireNetworkInOOBE must be unset as described in previous step before restrictions introduced by TenantLockdown CSP are removed.
Troubleshooting
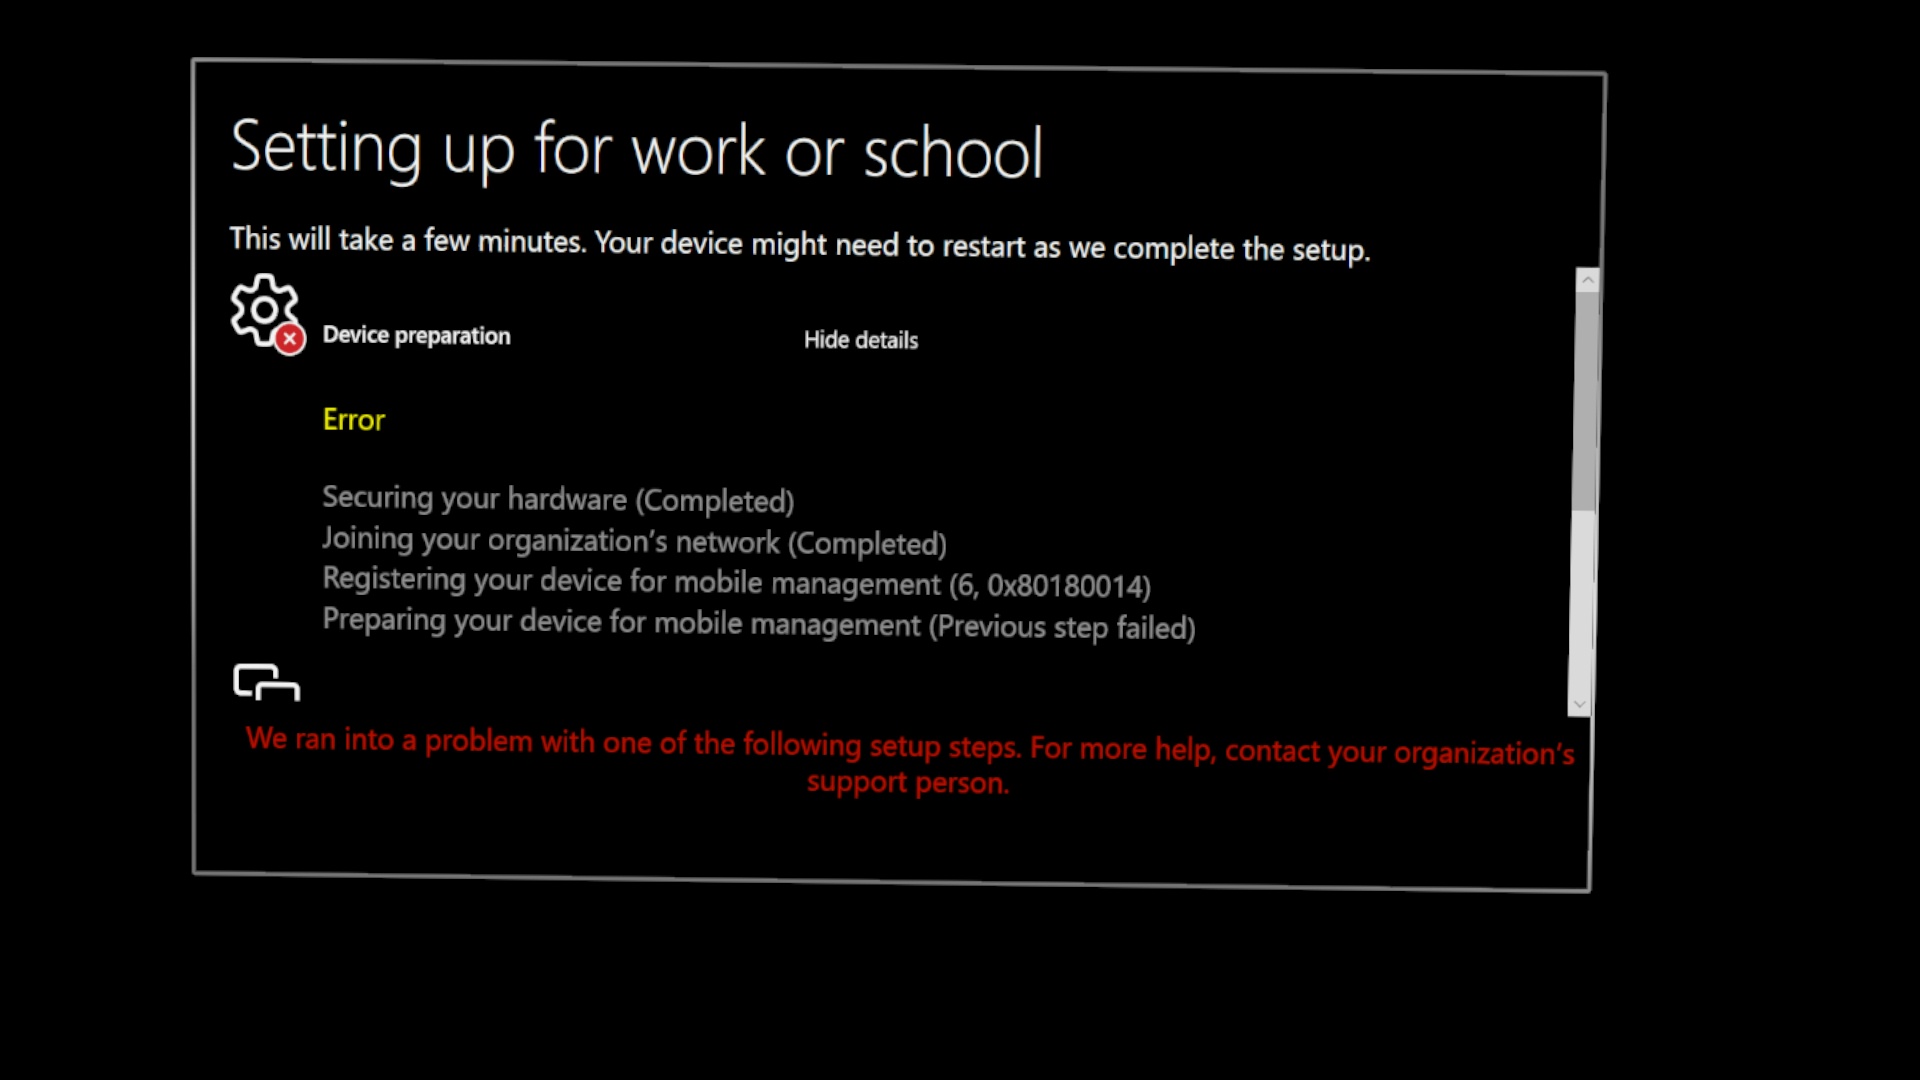
Issue - MDM enrollment fails with error 0x80180014 error code during Autopilot.
Symptoms
This is an error shown during the Autopilot process on device. This issue shown only applies when a HoloLens device has done the following:
- Already have gone through Autopilot at least once.
- Is now being reset and re-used again for Autopilot.
The experience is Autopilot experience will fail with a specific error.
Troubleshooting steps
- Follow steps at Troubleshoot Autopilot device import and enrollment to remove device from Intune. (Your Intune admin will need to perform this task)
- Once step 1 is complete, restart device and sign-in.
- Navigate to Settings -> Update & Security -> Reset & recovery and select Get started.
- If there are problems with steps 2 & 3, see alternatives to resetting the device at Reset / Reflash HoloLens.
AutoPilot should then successfully enroll.
Issue - Autopilot experience did not start even though the Autopilot profile is assigned in Intune.
Symptoms
By default, HoloLens 2 waits for 15 seconds to detect Autopilot after detecting the internet. If no autopilot profile is detected within 15 seconds, that means Autopilot was not discovered correctly, and you will see the EULA page.
Troubleshooting steps
- First please verify that Autopilot profile is shown as assigned in MDM portal, e.g. Intune.
- Reboot your device and try again. For more information, see Known Issues and Limitations.
Helpful resources
The following articles may be a useful resource for you to learn more information and troubleshoot Autopilot Issues, however these articles are based on Windows 10 Desktop and not all information may apply to HoloLens:
- Windows Autopilot - known issues
- Troubleshoot Windows device enrollment problems in Microsoft Intune
- Windows Autopilot - Policy Conflicts
Feedback and support for Autopilot
To provide feedback or report issues, use one of the following methods:
- For support on device registration, contact your reseller or distributor.
- For general support inquiries about Windows Autopilot, or for issues like profile assignments, group creation or MEM portal controls, contact Microsoft Endpoint Manager support
- If your device is registered to the Autopilot service and the profile is assigned on MEM portal, contact HoloLens support (see 'Support' card). Open a support ticket and if applicable, include screenshots and logs by capturing offline diagnostic logs during the out-of-box-experience (OOBE).
- To report an issue from the device, use the Feedback Hub app on your HoloLens. In Feedback Hub, select the Enterprise Management > Device category.
- To provide general feedback on Autopilot for HoloLens, you can submit this survey
Delete Autopilot devices
You may wish to no longer use a device for Autopilot, or to register your devices to a different tenant. If you would like to do this, then read how to delete Autopilot devices.
Exchange experience on HoloLens devices in need of repair or replacement
Microsoft automatically checks every HoloLens for Autopilot enrollment and will deregister the device from the customer's tenant. Microsoft ensures the replacement device is enrolled into Windows Autopilot once a replacement is shipped back to the customer. This service is available on all device exchange service orders directly with Microsoft.
Note
When customers use a Partner to return devices, the Partner is responsible for managing the exchange process including de-registering and enrolling devices into Windows Autopilot.
Feedback
Coming soon: Throughout 2024 we will be phasing out GitHub Issues as the feedback mechanism for content and replacing it with a new feedback system. For more information see: https://aka.ms/ContentUserFeedback.
Submit and view feedback for